Flowers
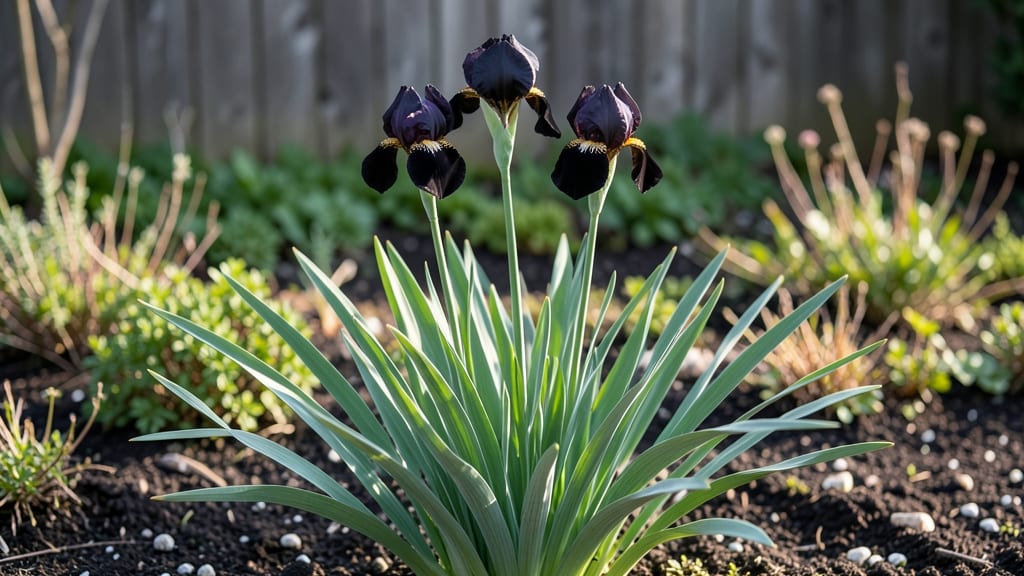
Growing black irises in your Pacific Northwest garden delivers dramatic, velvety blooms that thrive where many flowers falter. ✨ These frost-hardy stunners—with their deep purple-black petals—stand up to damp winters and thrive in partial shade, making them perfect for coastal gardens or shaded borders.
The secret to their striking color lies in well-draining soil and consistent moisture—not soggy roots. Plant rhizomes in late summer to early fall, when soil temps drop but before hard frost hits.
Even beginners can nail this: just dig a trench, lay rhizomes flat with tops exposed, and cover with 2 inches of soil.
By next spring, you’ll see sword-like foliage pushing through, followed by bold, almost-black blooms that last weeks. They multiply yearly, creating natural drifts that outshine store-bought flowers. Plus, deer and rabbits usually leave them alone—unlike many other perennials.
For the PNW’s wet climate, amend heavy soil with sand to prevent rot, and mulch lightly in winter. Watch for iris borers (tiny moth larvae)—the only real pest—but a quick spray of neem oil keeps them at bay. These irises reward patience with decades of drama in minimal care.
📚 In This Guide
- What you need
- Instructions
- Tips and common mistakes
- Wrapping up and next steps
What you need
- ● Black iris rhizomes: 3–5 healthy, firm rhizomes (ensure they’re disease-free and labeled for Iris x germanica or Iris ensata varieties).
- ● Well-draining soil: 5–10 bags (2–3 cubic feet each) of a mix like 50% garden soil + 50% perlite/sand (or pre-mixed iris/swamp soil if local).
- ● Compost: 1–2 bags (2 cubic feet each) for nutrient-rich planting.
- ● Organic fertilizer: 1 lb of balanced 10-10-10 or low-phosphorus iris-specific fertilizer (e.g., bone meal-free options).
- ● Mulch: 3–5 cubic feet of wood chips or pine straw (to insulate roots in winter).
- ● Garden trowel or spade: 1 medium-sized (for digging holes 6–8" deep).
- ● Gloves: 1 pair of cut-resistant, breathable gloves (rhizomes have sharp edges!).
- ● Pruners: 1 pair of sterilized, sharp pruners (for trimming dead foliage post-planting).
- ● Watering can or hose with nozzle: 1 with a gentle spray setting (irises hate soggy roots!).
- ○ pH testing kit (optional): To check soil acidity (ideal: 6.0–7.0 for black irises).
- ● Sunlight: A full-sun to partial-shade spot (6+ hours of sunlight daily; Pacific Northwest’s mild winters make this flexible!).
- ● Water source: Access to rainwater or a drip irrigation system (avoid overhead watering to prevent fungal issues).
- ● Frost tolerance: No special prep needed—black irises thrive in USDA Zones 3–9!
Step-by-Step guide to planting and cultivating black iris in cold climates
Here’s how to establish these dramatic, hardy perennials with minimal fuss.
🌱 Step 1: Choose the Perfect Planting Site
Black iris thrives in partial shade to full sun—at least 4-6 hours of morning sunlight in hotter Pacific Northwest summers. Avoid deep shade, where rhizomes rot and blooms fade. I dig a 12-inch deep hole in well-draining soil, since black iris despises soggy roots. Test drainage by filling the hole with water—if it drains within 30 minutes, it’s ready.
Amend heavy clay soil with 2-3 inches of compost (from your ingredients list) mixed into the bottom 6 inches of the hole. This improves aeration without overwhelming the rhizome’s natural hardiness. Pacific Northwest gardens often have acidic soil, so add a handful of lime if your soil pH tests below 6.5—black iris prefers slightly alkaline conditions.
🪴 Step 2: Plant Rhizomes at the Correct Depth and Spacing
Position rhizomes 2-3 inches below soil level, with the top third exposed—this prevents rot while allowing sunlight to reach growth points. I space them 18-24 inches apart in rows, since black iris spreads aggressively. Each rhizome should face the same direction to create a uniform, dramatic border.
Cover the rhizomes with 1 inch of soil, then backfill the hole gradually, tamping lightly to eliminate air pockets. Water deeply until moisture reaches 6 inches down, but avoid oversaturating—black iris roots need air circulation. A mulch layer of 3 inches of shredded bark (from your materials) keeps soil temperatures stable and suppresses weeds.
☀️ Step 3: Water and Fertilize for Strong Establishment
Water once weekly during the first 4-6 weeks after planting, keeping soil evenly moist but not soggy. Black iris rhizomes store water, so overwatering causes rot. You’ll know it’s right when the soil feels like a damp sponge—press your finger in; if moisture lingers 1 inch down, hold off until it dries slightly.
In early spring, apply a balanced 10-10-10 fertilizer (from your ingredients) at ¼ pound per 100 square feet. Scatter granules 3 inches away from rhizomes and water in immediately. Avoid high-nitrogen fertilizers—they promote leafy growth at the expense of blooms. Repeat in late summer after flowering to encourage next year’s buds.
✂️ Step 4: Prune and Divide for Long-Term Health
Cut back yellowed or damaged foliage in late fall, but leave 3-4 inches of stem to protect the rhizome during winter. Black iris is frost-resistant, but heavy snow can break stems. I use a 3-inch layer of mulch (from your materials) in winter to insulate rhizomes—remove it in early spring before new shoots emerge.
Divide clumps every 3-4 years in early spring or fall. Dig up rhizomes, separate sections with 3-4 healthy fans of leaves, and replant immediately. Discard soft, mushy rhizomes—they’re rotting. Replant divisions 12 inches apart to prevent overcrowding, which reduces bloom quality. You’ll see stronger, more vibrant flowers within 2 years of dividing.
Tips & tricks for perfect black iris flower cultivation
These hard-won insights will help you avoid common pitfalls and maximize your black iris's dramatic potential in Pacific Northwest gardens.
Site Selection Insight: The 4-6 hours of morning sunlight in Step 1 is non-negotiable for Pacific Northwest gardens. If your site gets intense afternoon sun, consider partial shade to prevent leaf scorch while still getting enough light for vibrant blooms. I've found that east-facing borders work perfectly—morning sun builds energy without the afternoon heat stress.
Rhizome Placement Technique: When positioning rhizomes 2-3 inches below soil level in Step 2, make sure the growth points (small bumps) face upward. This ensures your plants emerge straight and strong. A quick trick: Place rhizomes on a flat surface and orient them so the growth points point toward the sky before covering with soil.
Drainage Test Precision: The 30-minute drainage test in Step 1 is your best friend. If water lingers longer, amend with more compost or consider raised beds. I've seen black iris rhizomes rot in just 48 hours when planted in poorly draining soil—don't skip this critical step! For heavy clay soils, mix in perlite or coarse sand to improve drainage without compromising soil structure.
Fertilizing Strategy: The balanced 10-10-10 fertilizer application in Step 3 should be your spring and summer ritual. For an extra boost, I mix in a handful of bone meal at planting time—it provides phosphorus for strong root development. Just remember to keep fertilizer granules 3 inches away from rhizomes to prevent burning sensitive roots.
Pro Tips for Black Iris Flower
- These hard-won insights will help you avoid common pitfalls and maximize your black iris's dramatic potential in Paci...
- Site Selection Insight: The 4-6 hours of morning sunlight in Step 1 is non-negotiable for Pacific Northwest gardens. ...
- Rhizome Placement Technique: When positioning rhizomes 2-3 inches below soil level in Step 2, make sure the growth po...
Frequently asked questions
Got questions about growing black iris flowers in your Pacific Northwest garden? You’re not alone! Here are some of the most common queries—and their straightforward answers—to help you cultivate these dramatic blooms with confidence.
Are black irises really frost-hardy, or do they need winter protection?
Yes!
Black irises (like Iris x germanica varieties) are USDA zones 3–9 hardy, meaning they thrive in PNW winters. However, mulch with 2–3 inches of straw or leaves after the first frost to shield rhizomes from extreme cold. Avoid heavy mulch, which can rot them.
How long does it take for black irises to bloom after planting?
Patience is key! First-year plants may send up foliage but won’t bloom—they’re building roots. Expect 2–3 years for mature blooms, though established rhizomes can flower reliably for decades with proper care.
Can I grow black irises in containers instead of garden beds?
Absolutely!
Use a wide, shallow container (at least 12 inches deep) with well-draining soil mixed with perlite. Place in full sun and overwinter indoors (50–60°F) or bury pots in garden soil for protection. Dwarf varieties like ‘Black Game’ work best.
Why aren’t my black iris flowers opening, even though the stalks are tall?
This is often due to overcrowding, poor light, or lack of nutrients. Divide rhizomes every 3–4 years to prevent congestion. Ensure they get 6+ hours of sun daily and feed with balanced fertilizer (10-10-10) in early spring. Bonus: Deadhead spent blooms to encourage reblooming.
Do black irises need special watering in the rainy PNW?
While PNW rain helps, overwatering can drown rhizomes. Water deeply but infrequently—aim for 1 inch per week—and ensure containers or beds have excellent drainage. Avoid soggy soil, especially in winter, to prevent rot.
Wrapping up and next steps
The black iris flower is a stunning, frost-resistant gem that thrives in the Pacific Northwest’s climate—adding drama, elegance, and low-maintenance beauty to your garden. Whether you’re a seasoned gardener or just starting, these striking blooms reward patience with their bold presence and resilience. Ready to transform your outdoor space?
🌱 Next steps:
- Pick your favorite black iris variety (like ‘Black Gamecock’ or ‘Black Clown’) and gather supplies.
- Start planting in early spring or fall for the best results.
- Share your progress with fellow PNW gardeners—tag us @YourGardenPNW!