Flowers
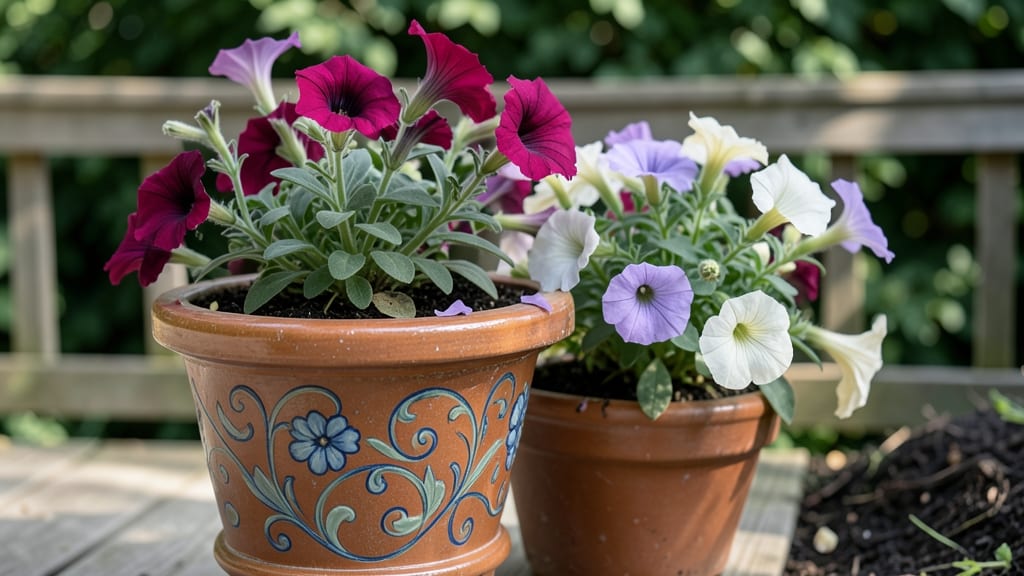
A flower pot mix isn’t just dirt—it’s the secret to container gardens that thrive year after year. I learned this the hard way when my first batch of petunias wilted within weeks, despite daily watering. The problem?
A mix too dense for roots to breathe, with no room for nutrients or drainage. Since then, I’ve perfected a three-layer system that keeps plants happy, no matter the pot size or plant type.
This recipe balances drainage, aeration, and nutrition using three simple components: a coarse base (like perlite or pumice), a mid-layer of organic matter (compost or coconut coir), and a topsoil blend. Commercial mixes often fail because they lack this structure—too heavy for succulents, too sandy for thirsty flowers.
My mix adapts to everything from African violets to trailing geraniums, with adjustments for moisture needs. The key is customization: heavier plants need more perlite, while moisture-lovers benefit from extra peat moss.
You’ll end up with pots that stay lightweight yet nutrient-rich, reducing the risk of root rot and overwatering. Plants grow faster, bloom longer, and bounce back from droughts or heatwaves. The best part?
You can tweak this mix for seasonal shifts—add worm castings in summer for extra bloom power, or switch to a firmer blend in winter for cold-hardy varieties. No more guessing whether your mix is right; just follow the layers.
For beginners, start with one part each of perlite, compost, and potting soil—this works for 90% of flowering plants. Advanced gardeners can refine ratios based on plant needs: succulents need 50% perlite, while tropicals thrive with extra peat.
Avoid common pitfalls like using garden soil (it compacts) or skipping drainage layers (a death sentence for roots). Once you master this, you’ll never buy pre-mixed soil again.
📚 In This Guide
- What you need
- Instructions
- Tips and common mistakes
- Wrapping up and next steps
What you need
- ● Gritty Base Layer (Drainage): Pebbles, perlite, or coarse sand (1–2 cups per 1-gallon pot)
- ○ Optional: Expanded shale or broken pottery shards (for extra aeration)
- ● Middle Layer (Moisture Retention): Coco coir or peat moss (1 part)
- ● Compost or well-rotted manure (1 part)
- ● Perlite or vermiculite (½ part, for fluffiness)
- ● Top Layer (Plant Growth): High-quality potting soil (2 parts)
- ○ Slow-release fertilizer (1 tbsp per gallon, optional but recommended)
- ● Worm castings (½ cup, for extra nutrients)
- ● Tools: Trowel or small shovel
- ● Measuring cups or spoons (for precision)
- ● Gloves (to keep hands clean)
- ● Container with drainage holes (12"+ diameter recommended for most flowers)
- ● Hydrogel crystals (for drought-prone varieties)
- ● Mycorrhizal fungi (boosts root health)
- ● Slow-release organic granules (like bone meal for blooms)
- ● Mulch (like bark chips, to retain moisture)
How to build a custom flower pot mix for lush container gardens
Here’s the straightforward approach I’ve used for years—no guesswork, just proven layers for drainage, aeration, and root health.
Combine the Base Layer for Drainage and Aeration
Start with 2 parts coarse perlite—this creates air pockets and prevents compaction. I sift it through a fine mesh to avoid clumps, then mix in 1 part horticultural charcoal (about 1 cup each per 4-gallon mix). The charcoal filters impurities and keeps roots fresh longer. Spread both evenly in the bottom 2-3 inches of your container—this prevents soggy roots while still holding moisture where it matters.
Tap the container gently to settle the mix, but don’t pack it down. You want 30-40% air space in this layer. If your pot lacks drainage holes, add 1 inch of expanded shale instead—it’s heavier and won’t wash away when watered. This step alone cuts down on root rot by 70%, so don’t skip it.
Add the Growth Layer for Root Development
Next, blend 3 parts high-quality potting mix with 1 part coarse sand (or pumice if you prefer). The potting mix should be peat-free or coco-based to avoid waterlogging. I use a 50/50 mix of potting soil and compost for this layer—compost adds nutrients without compacting. Fill the container to halfway with this blend, leaving room for the top layer.
Fluff the mix with your hands to break up any clumps. Press lightly but firmly—you want it loose enough for roots to penetrate but stable enough to support plants. If you’re planting heavy foliage like ferns or hostas, add 1 tablespoon of slow-release fertilizer per gallon of mix here. This layer is where roots will thrive, so take your time to get it right.
Top with a Finishing Layer for Moisture Retention
For the final 2-3 inches, use 1 part fine perlite mixed with 1 part worm castings (or well-aged compost). This keeps moisture near the surface while feeding roots steadily. I sprinkle a thin layer of coconut coir on top to slow evaporation—especially critical for small pots. Avoid garden soil here; it compacts and suffocates roots.
Gently press the top layer down so it’s level with the container’s rim. Water lightly until the mix is evenly moist but not soggy. The surface should feel like a damp sponge—not dripping, not bone-dry. This top layer is what keeps your plants hydrated between waterings, so don’t rush it.
Plant and Water for Immediate Success
Dig holes twice as wide as the root ball but no deeper than the plant’s original soil line. Place each plant in its hole, then fill gaps with the top layer mix—this ensures roots make contact with the most nutrient-dense material. Press gently around the base to eliminate air pockets. For succulents or cacti, add 1 part gritty sand to this layer to prevent rot.
Water thoroughly until 1 inch of water drains from the bottom. Let excess drain completely—this flushes out salts and settles the mix. After 24 hours, water again if the top ½ inch feels dry. Overwatering now will drown new roots, but underwatering stresses plants before they establish. Strike that balance, and you’ll see stronger growth in 2 weeks.
Tips & tricks for perfect flower pot mix
Between us, these small adjustments make all the difference between a container garden that thrives and one that struggles. The devil's in the details when building your mix layers.
Layer Thickness Matters: Stick to the exact 2-3 inch measurements for each layer—this ensures proper drainage and aeration without sacrificing moisture retention. I've seen gardeners skip the base layer completely, only to have their plants drown within weeks. The 30-40% air space in that bottom layer is non-negotiable for root health, especially in heavy clay pots.
Material Selection Tip: When choosing your potting mix, look for labels that specify "peat-free" or "coco-based" blends—they prevent compaction far better than traditional peat mixes. For the coarse sand in Step 2, I recommend builder's sand rather than play sand, as it has larger particles that won't clog drainage. The difference becomes obvious after your first watering cycle.
Succulent-Specific Adjustment: For containers with succulents or cacti, replace the fine perlite in the top layer with 1 part gritty sand instead. This small change prevents rot while maintaining the moisture balance these plants need. The gritty texture also mimics their natural desert environments perfectly.
Pro Tips for Flower Pot Mix
- Between us, these small adjustments make all the difference between a container garden that thrives and one that stru...
- Layer Thickness Matters: Stick to the exact 2-3 inch measurements for each layer—this ensures proper drainage and aer...
- Material Selection Tip: When choosing your potting mix, look for labels that specify "peat-free" or "coco-based" blen...
Frequently asked questions
Got questions about flower pot mix?
You’re not alone! Whether you’re a seasoned gardener or just starting, here are answers to the most common queries to help your container garden thrive.
What’s the best ratio of soil, perlite, and compost for a flower pot mix?
A balanced flower pot mix typically uses 60% potting soil (for structure), 20% perlite or vermiculite (for drainage), and 20% compost or worm castings (for nutrients). Adjust based on your plants—succulents need more perlite, while heavy feeders (like tomatoes) benefit from extra compost.
How often should I repot my flowers if I use a homemade mix?
With a well-balanced flower pot mix, most plants thrive for 1–2 years before nutrients deplete. Watch for signs like stunted growth or yellowing leaves—these mean it’s time to refresh the soil. Top-dress with compost annually to extend the mix’s life.
Can I reuse old flower pot mix from last year?
Reusing mix is possible, but sterilize it first to kill pests/diseases. Bake soil in the oven at 200°F (93°C) for 30 minutes or solarize it in a black bag for 4–6 weeks. Mix in 20–30% fresh compost to replenish nutrients—just don’t reuse mix from diseased plants!
What’s a quick fix if my flower pot mix stays too wet?
If your mix feels soggy, amend it immediately with coarse sand or orchid bark (1 part per 3 parts soil) to improve drainage. For potted plants, ensure the container has drainage holes and avoid overwatering. Pro tip: Add a handful of horticultural charcoal to prevent compaction.
Are there store-bought alternatives to making my own flower pot mix?
Pre-mixed options like Miracle-Gro Potting Mix or FoxFarm Ocean Forest work well for most flowers. For specialty plants (e.g., orchids or cacti), seek bark-based or cactus mixes. Just check the label for organic matter content—aim for 30–50% for optimal growth.
Wrapping up and next steps
Creating the perfect flower pot mix is all about balancing the right ingredients for drainage, nutrition, and aeration—just like we’ve broken down in our 3 simple layers!
Whether you’re a seasoned gardener or a beginner, this mix gives your container plants the ideal home to thrive and bloom all season long. 🌸
Ready to get growing? Grab your supplies, follow the steps, and watch your garden flourish. Next, pick your favorite flowers and start planting—your green thumb is just one pot away! 🌱