Flowers
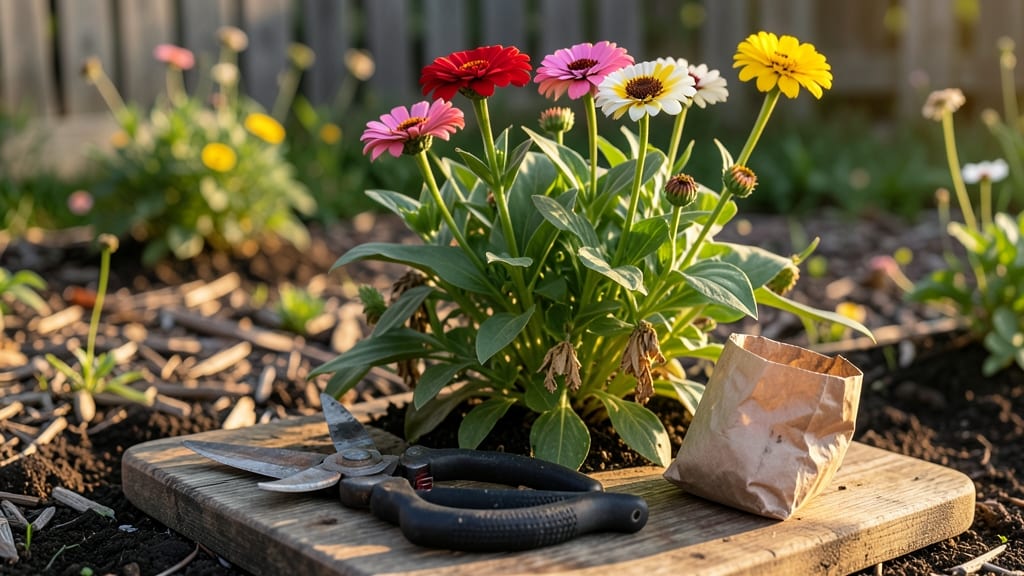
Saving seeds from flowers is like unlocking a free lifetime supply of plants—no nursery trips, no price tags, just pure gardening magic. 🌱 I’ve collected seeds from everything from heirloom tomatoes to stubborn marigolds, and once you try it, you’ll never buy seeds again.
The key? Timing, patience, and knowing which flowers actually produce viable seeds (hint: not all do).
You’ll need just a few simple tools: scissors or pruners, paper bags for drying, labels, and a dry, dark spot for storage. Some flowers, like beans and peas, give up their seeds easily, while others, like tomatoes, need careful handling to avoid mold.
The process takes about 2-4 weeks from harvest to ready-to-plant seeds, and the best part? You’ll end up with plants that thrive exactly like their parents—often better, since they’re adapted to your local climate.
Imagine opening your seed stash next spring and planting varieties you love, knowing they’ll grow just as beautifully as the first time. No more guessing at seed packets or settling for store-bought flowers that fade fast.
With proper drying and storage, these seeds can last 3-5 years, giving you a head start on seasons to come. Ready to turn your garden into a seed-saving powerhouse?
We’ll cover everything from picking the right flowers to storing seeds so they stay fresh—plus, the common mistakes that turn good seeds into dust. Let’s get started!
📚 In This Guide
- What you need
- Instructions
- Tips and common mistakes
- Wrapping up and next steps
What you need
- ● Mature flowers or seed pods: Choose healthy, fully bloomed flowers (or dried seed heads) from plants you want to propagate. Ensure they’re disease-free.
- ● Paper bags or breathable containers: 3–5 medium-sized brown paper bags (or mesh bags) to collect seeds and allow airflow.
- ● Scissors or pruning shears: Sharp, clean tools to snip seed pods or stems without damaging them.
- ● Labeling tags or markers: Small tags and a pen to label seeds by plant type (e.g., "Sunflower – 2024").
- ○ Drying surface: A clean, flat tray, screen, or newspaper to lay out seeds for drying (optional but helpful for bulk collection).
- ● Glass jars with lids: For storing seeds long-term (add a packet of silica gel to absorb moisture).
- ● Fine-mesh sieve: To separate seeds from chaff or debris quickly.
- ● Magnifying glass: For inspecting tiny seeds or identifying plant parts.
- ● Humidity-controlled space: A cool, dry area (like a basement or closet) for drying seeds properly.
- ● Gloves: If handling prickly or sticky seed pods (e.g., milkweed or okra).
Step-by-Step guide for harvesting seeds from flowers
Here's how I collect viable seeds from mature blooms—no fancy tools, just patience and observation.
🌱 Step 1: Identify Mature Flowers Ready for Seed Collection
Wait until flowers have fully bloomed and begun to wilt. This usually means the petals have fallen or turned brown, and the center of the flower looks dry. For example, sunflowers form a large, papery seed head, while tomatoes develop a yellowed, wrinkled fruit. The key is watching for the plant's natural signal that reproduction is complete.
Gently squeeze the flower head or fruit to feel if it's firm but yielding—not rock-hard like an unripe tomato or brittle like a dried-up bloom. If seeds rattle inside when you shake it, they're ready. I like to collect seeds on a dry, overcast day because damp seeds won't store well. Harvesting too early means immature seeds that won't germinate, while waiting too long risks them scattering or rotting on the plant.
🌿 Step 2: Remove Seeds from the Flower or Fruit
For flowers with dry seed heads (like marigolds or cosmos), place the entire head in a paper bag and tie it securely. Leave it for 1-2 days—the seeds will naturally fall into the bag. For fleshy fruits (like tomatoes or peppers), cut open the mature fruit and scoop out the seeds with a spoon. Rinse the seeds immediately under cool water to remove any pulp or gel that can cause mold.
If dealing with pods (like peas or beans), let them fully dry on the plant until they turn brown and begin to crack open. Once dry, gently crush the pod to release the seeds. I always work on a clean surface—like a baking sheet or newspaper—to avoid contamination. Never use metal tools, as they can damage the delicate seed coats.
💧 Step 3: Clean and Dry the Seeds for Storage
Spread the seeds in a single layer on a dry, clean paper towel or mesh screen. Let them air-dry in a warm, dry place for 5-7 days, stirring occasionally to ensure even drying. The seeds are ready when they feel dry to the touch and no longer stick together. Humidity is the enemy here—moisture will cause mold or rot during storage.
For seeds with pulp or gel (like tomatoes or citrus), I rinse them in a fine-mesh strainer under running water, then spread them to dry. Once fully dry, transfer the seeds to a labeled envelope or small jar. I always include the plant name, collection date, and any notes about the variety. Store in a cool, dark place—like a sealed container in the fridge—for up to 5 years, depending on the seed type.
Tips & tricks for perfect seed harvesting from flowers
These little details make all the difference between seeds that store well and ones that won't last the season.
Timing is Everything: In Step 1, when you're checking for mature flowers, look for that perfect balance—petals should be mostly gone but not completely dried out. I've learned the hard way that seeds from flowers that are still slightly green won't germinate properly. The "rattle test" is your best friend here: give the seed head a gentle shake and listen for that telltale sound of seeds moving inside. This usually means they're ready to collect, but not quite overripe.
Bag Technique for Dry Seed Heads: When using the paper bag method in Step 2, make sure to fully enclose the seed head and tie the bag securely. I've seen seeds escape through tiny gaps and end up scattered all over the garden! Leave the bag hanging from a hook or place it on a flat surface—just make sure it's stable. The 1-2 day wait gives seeds time to fully detach while keeping them contained. Pro tip: Use brown paper bags rather than white—they're less likely to show dirt and debris.
Drying Strategy: For Step 3's drying process, I've found that a small fan on low setting helps speed up drying without creating drafts that could scatter seeds. Place your drying tray in a spot with good airflow but no direct sunlight—this prevents uneven drying and potential heat damage. Stir your seeds every 24 hours to ensure they dry evenly. I've had entire batches spoil because I forgot to stir them, so set a reminder if needed! The 5-7 day drying time is crucial—rushing this step can lead to moldy seeds.
Storage Secrets: When storing your seeds, consider adding a small packet of silica gel to your container for extra moisture protection. I label my containers with both the plant name and collection date—this helps me track seed viability over time. For long-term storage beyond 5 years, you can extend their shelf life by placing them in the freezer. Just remember to use airtight containers specifically designed for freezing to prevent moisture buildup.
Pro Tips for Get Seeds From Flowers
- These little details make all the difference between seeds that store well and ones that won't last the season.
- Timing is Everything: In Step 1, when you're checking for mature flowers, look for that perfect balance—petals should...
- Bag Technique for Dry Seed Heads: When using the paper bag method in Step 2, make sure to fully enclose the seed head...
Frequently asked questions
Got questions about harvesting seeds from flowers? You’re not alone!
Here are some of the most common queries—and their straightforward answers—to help you master the process like a pro.
Can I get seeds from any flower?
Not all flowers produce seeds—some are sterile or hybridized to prevent seed formation. Look for open-pollinated varieties (like sunflowers, marigolds, or zinnias) or check seed packets for "true-to-type" labels. If unsure, ask a local nursery or gardening forum!
When is the best time to collect seeds?
Timing matters! Harvest seeds when the flower head dries out and turns brown (for annuals) or in late fall (for perennials). For example, wait until sunflower petals drop and the center turns papery. Pro tip: Collect seeds on a dry day to avoid mold.
What if my seeds don’t germinate?
Seeds may fail to sprout due to age, poor storage, or dampness. Try these fixes:
- Test viability: Soak seeds in warm water for 24 hours—if they sink, they’re likely viable.
- Stratify: Cold-moisten seeds (e.g., milkweed) in a fridge for 4–6 weeks.
- Scarify: Lightly sand or nick hard-coated seeds (like poppies) to help water penetrate.
How do I store seeds for next year?
Keep seeds cool, dry, and dark in airtight containers (like envelopes or jars). Label with the plant name and date! Most seeds stay viable for 1–5 years—check a seed viability chart for specifics.
Can I save seeds from store-bought flowers?
Yes, but with caution! Store-bought flowers may be hybrids (like petunias) and won’t grow true to type. Stick to heirloom or open-pollinated varieties from seed companies for reliable results. Always check labels or ask the seller.
Wrapping up and next steps
You’ve now unlocked the secret to harvesting seeds from your favorite flowers—what a rewarding skill! 🌱 Whether you’re saving money, preserving heirloom varieties, or simply embracing sustainable gardening, every seed you collect is a tiny promise of future blooms. Ready to turn your garden into a seed-saving powerhouse?
Start small: pick one flower type this season, follow the steps you’ve learned, and soon you’ll be sharing (or swapping!) seeds with fellow gardeners. Happy growing!