Propagation
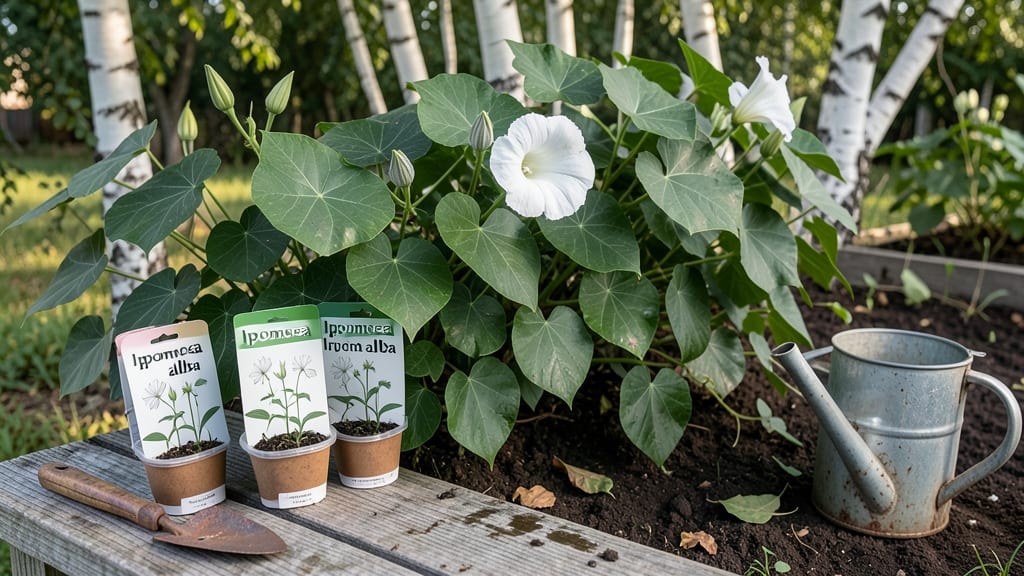
Starting moonflower seeds feels like unlocking a secret garden—those ghostly white blooms only open at night, and they’re easier to grow than you think. 🌿 The key to fast germination isn’t complicated: it’s all about moisture, warmth, and patience (though I’ll admit, waiting for those first sprouts can feel like forever).
Moonflowers are annuals, meaning they’ll bloom spectacularly in one season before returning to seed, but they’re worth the effort. You’ll need a warm spot—think 70°F soil—and a shallow planting depth of just ¼ inch.
Too deep, and they’ll struggle; too shallow, and they’ll dry out before sprouting. I’ve found that soaking seeds overnight cuts germination time in half.
Once sprouted, keep them in bright, indirect light until they’re sturdy enough for direct sun. You’ll see those first true leaves in about 10-14 days, and by midsummer, you’ll have vines climbing eagerly toward trellises.
The blooms? They’re worth every minute of waiting—imagine waking up to find your garden glowing under moonlight.
Here’s the thing—moonflowers are forgiving once established, but those first few weeks are critical. Too much water? Roots rot. Not enough? They’ll stall. Stick with me, and you’ll have a garden that feels like magic by July. Ready to get those seeds going?
📚 In This Guide
- What you need
- Instructions
- Tips and common mistakes
- Wrapping up and next steps
What you need
- ● Moonflower seeds – Choose Ipomoea alba or Ipomoea alba ‘Moonlight’ for classic white blooms. Buy 5–10 seeds (they’re fast-growing, so a small batch is perfect for beginners).
- ● Biodegradable seed-starting pots – 3–4 inch diameter, 4–6 pots (or a seed tray with cells). Look for peat or coconut coir-based pots to avoid transplant shock.
- ● Seed-starting mix – A lightweight, sterile potting mix (e.g., Pro-Mix or FoxFarm Seedling Mix). Avoid garden soil—it’s too dense and can harbor fungi.
- ● Grow lights or sunny windowsill – Moonflowers need 6–8 hours of light daily. A full-spectrum LED grow light (12–18 inches above seedlings) works if natural light is limited.
- ● Spray bottle with water – For gentle hydration without disturbing seeds. A 16 oz misting bottle is ideal.
- ○ Clear plastic dome or plastic wrap – To create a humidity tent (optional but speeds up germination).
- ● Small hand trowel or spoon – For planting seeds at the correct depth (¼ inch deep).
- ● Labels & marker – To track planting dates and varieties (moonflowers grow fast—you’ll thank yourself later!).
- ○ Fertilizer (optional) – A balanced, water-soluble fertilizer (e.g., 5-5-5 or 10-10-10) diluted to ½ strength. Start 2–3 weeks after germination.
- ● Support structure (for later) – A trellis, fence, or tomato cage (6+ feet tall) for vining varieties. Moonflowers can climb 15+ feet!
- ○ Temperature – Moonflower seeds germinate best in 70–85°F (21–29°C). Use a seedling heat mat (optional) if your home runs cooler.
- ● Humidity – Keep soil consistently moist (not soggy). A humidity dome helps in dry climates.
- ● Patience (but not too much!) – Germination takes 7–14 days. If you’re in a hurry, soak seeds in warm water for 4–6 hours before planting.
Step-by-step instructions for starting moonflower seeds
Here's how to coax those delicate moonflower seedlings along—no guesswork, just reliable results.
🌱 Step 1: Pre-Soak Seeds for Faster Germination
Moonflower seeds have a tough outer shell that slows things down. Place them in a bowl of lukewarm water for 12-24 hours—this softens the seed coat and speeds up sprouting. I like to use a small mesh bag so I can easily lift them out without losing any.
Check them after 12 hours. If the water stays cloudy, drain and refresh it—the seeds will start swelling noticeably. This pre-soaking is what makes the difference between waiting weeks and seeing sprouts in 5-7 days.
💧 Step 2: Plant in Warm, Moist Soil
Fill your seed-starting containers with a light, well-draining mix—moonflowers hate soggy roots. I use a blend of 50% potting soil and 50% perlite to keep things airy. Plant the pre-soaked seeds just ½ inch deep, spacing them 2 inches apart.
Water gently until the soil is evenly moist but not dripping. The key here is warmth—cover the tray with plastic wrap or a humidity dome to trap heat. Place it in a spot that stays around 70-75°F, like on top of a refrigerator or near a sunny window.
☀️ Step 3: Provide Bright, Indirect Light
Moonflower seedlings need light to grow strong, but too much direct sun too soon will scorch them. Start with bright, indirect light for the first 5-7 days—a north-facing window or under fluorescent lights works well. You'll know they're getting enough when the first true leaves (not the initial seed leaves) appear.
Once the seedlings have 2-3 sets of true leaves, you can gradually introduce 4-6 hours of morning sun. Watch for leggy growth—if stems stretch too tall and thin, your light isn't strong enough. At this stage, I move mine under a grow light for 14 hours a day to keep them compact.
🌿 Step 4: Thin and Harden Off Seedlings
When seedlings reach 2 inches tall, thin them to 1 plant per cell or 6 inches apart if in a larger container. Use scissors to snip unwanted seedlings at soil level—this prevents disturbing the roots of the ones you're keeping. I always save the thinned seedlings for compost or transplant them as microgreens.
Two weeks before your last frost date, start hardening them off. Place the seedlings outside in a sheltered spot for 1-2 hours the first day, then gradually increase their time outdoors over 7-10 days. Moonflowers are tender, so avoid full sun or wind during this period—partial shade is best.
Tips & tricks for perfect moonflower seed germination
Here's what I learned after struggling with slow sprouts—these tricks cut germination time in half.
Seed Selection Tip: Choose seeds that are plump and firm, not shriveled or cracked. I've found that seeds sold specifically for moonflowers (like those from Moonflower Vine seeds) germinate faster than generic seeds. Store them in a cool, dry place until ready to use—moisture is their enemy before planting.
Soaking Secret: The 12-24 hour soak is non-negotiable for these tough seeds, but here's the trick: use a shallow container with just enough water to cover the seeds by 1 inch. Too much water can cause them to float or develop mold. After 12 hours, if they haven't swollen noticeably, extend the soak to 24 hours—they're ready when they double in size and feel slightly spongy between your fingers.
Warmth Hack: Maintaining that 70-75°F range is easier than it sounds. I place my seed trays on top of my refrigerator (where it's naturally warm) or use a seedling heat mat set to low. If your home runs cooler, consider a small greenhouse or clear plastic tent with a heat source underneath. Just avoid placing them near drafts or air vents—consistent warmth is what triggers germination.
Light Transition: When you're ready to introduce those 4-6 hours of morning sun in Step 3, start with just 2 hours on the first day. Moonflower seedlings are sensitive to sudden light changes, and this gradual approach prevents shock. I notice the biggest difference in stem strength when I do this—seedlings stay stocky and green rather than stretching toward the light.
Pro Tips for Start Moonflower Seeds
- Here's what I learned after struggling with slow sprouts—these tricks cut germination time in half.
- Seed Selection Tip: Choose seeds that are plump and firm, not shriveled or cracked. I've found that seeds sold specif...
- Soaking Secret: The 12-24 hour soak is non-negotiable for these tough seeds, but here's the trick: use a shallow cont...
Frequently asked questions
How long does it take for moonflower seeds to germinate?
Moonflower seeds typically germinate within 7–14 days when kept in warm (70–80°F), moist conditions. If your seeds haven’t sprouted after 2–3 weeks, gently check for mold or rot—discard any suspicious seeds and refresh the soil mix. Patience is key, but consistent warmth and moisture speed things up!
Can I plant moonflower seeds directly in the ground, or do I need to start them indoors?
Moonflower seeds are hardy and fast-growing, so you can direct-sow them outdoors after the last frost when soil is at least 60°F. However, starting them indoors (4–6 weeks before the last frost) gives them a head start in cooler climates. If you’re in a warm zone, skip the indoor step—just plant them shallowly (½ inch deep) in well-drained soil.
Why aren’t my moonflower seeds sprouting? Troubleshooting tips?
Common culprits include:
- Cold soil: Moonflowers need warmth to germinate—try a heat mat or move pots to a sunny windowsill.
- Too much moisture: Overwatering causes rot; keep soil damp (not soggy) and use a tray with drainage.
- Old or low-quality seeds: Store seeds in a cool, dry place and use them within 1–2 years for best results.
- Poor soil contact: Press seeds lightly into soil to ensure they make contact with moisture.
Do moonflowers grow back every year, or are they annuals?
Moonflowers (Ipomoea alba) are fast-growing annuals, meaning they complete their life cycle in one season and don’t return unless you reseed. However, their seeds often self-sow in warm climates, leading to surprise blooms the next year! Save seeds from healthy plants to replant or share with fellow gardeners.
What’s the best temperature range for growing moonflowers?
Moonflowers thrive in warm weather and prefer daytime temps between 70–85°F. They’re sensitive to frost—plant after the last frost date in your area. In cooler zones, grow them as annuals and enjoy their rapid growth (they can climb 10+ feet in a season!). If nights dip below 50°F, consider starting seeds indoors or using row covers.
Wrapping up and next steps
Growing moonflower seeds is a rewarding journey that brings magical, fragrant blooms to your garden with just a little patience and care. By following these germination secrets—from soaking seeds to providing the right warmth and moisture—you’ll unlock fast, reliable growth and stunning nighttime displays. 🌙✨
Now that you’re armed with the know-how, take the next step: grab those seeds, prep your space, and watch your garden transform into a moonlit paradise. Happy planting—your moonflowers are waiting for you! 🌱💚