Flowers
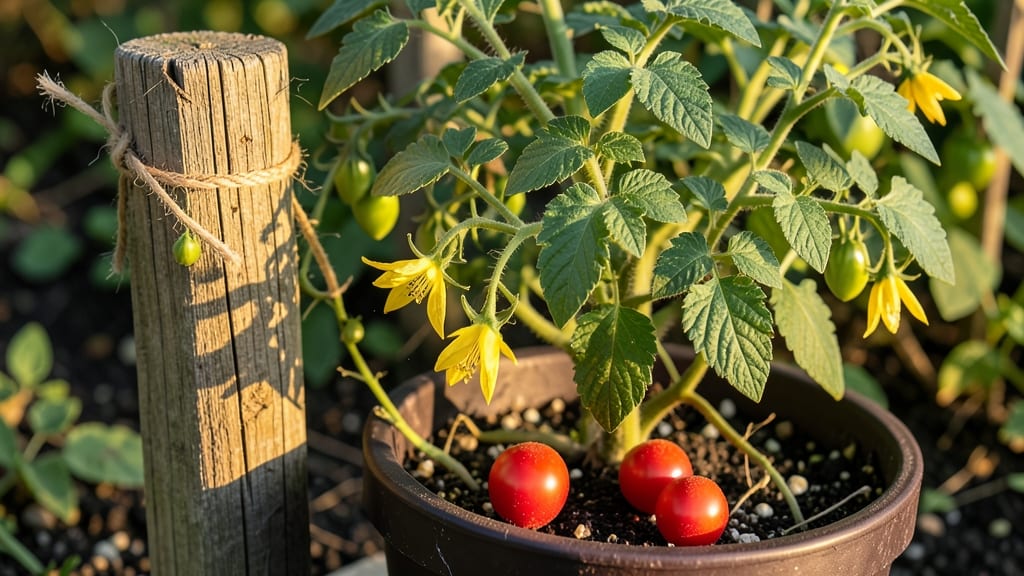
The delicate tiny Tim tomato flower signals summer’s last hurrah in the Pacific Northwest, where these cherry tomatoes defy frost and heat—yielding sweet, bite-sized fruit well into October. frost.
The secret lies in its compact growth habit, early maturity, and ability to bounce back from temperature swings that would kill other varieties.
The plant itself stays under 2 feet tall, making it perfect for containers, small gardens, or even windowsills. You’ll need well-draining soil mixed with compost, a sunny spot (at least 6-8 hours of light daily), and consistent moisture—never soggy roots.
Tiny Tim’s flowers are abundant and self-pollinating, so you’ll see fruit forming within 50-60 days of transplanting, even in cooler climates.
What you’ll love most is the prolonged harvest—these tomatoes don’t all ripen at once, so you get a steady supply from summer through fall. The flavor? A perfect balance of sweet and tangy, with just the right size for snacking straight off the vine.
Plus, its resistance to common diseases means fewer headaches and more time enjoying the garden.
Fair warning: Tiny Tim can be prone to blossom drop if stressed, so keep soil evenly moist and avoid over-fertilizing with nitrogen. With the right care, though, you’ll end up with a foolproof producer that outperforms most tomatoes in your region. Ready to grow yours?
📚 In This Guide
- What you need
- Instructions
- Tips and common mistakes
- Wrapping up and next steps
What you need
- ● Tiny Tim tomato plant: 1-3 seedlings or seeds (choose disease-resistant varieties like 'Tiny Tim' or 'Micro Tom' for cold tolerance).
- ● Well-draining potting mix: 5-10 gallons (look for a blend with peat moss or coconut coir for moisture retention).
- ● Containers or garden bed: Option 1: 5-gallon pots or larger (for container growing).
- ● Option 2: Raised beds or in-ground plots (ensure 12+ inches of soil depth).
- ● Slow-release fertilizer: 1-2 cups (balanced 10-10-10 or tomato-specific formula).
- ● Mulch: Straw or shredded leaves (2-3 inches to insulate roots).
- ● Support system: Small cages or stakes (for vining varieties).
- ● Watering can or hose with gentle nozzle: For consistent moisture.
- ● Frost cloth or row covers: Lightweight fabric to protect young plants from late frosts.
- ● Grow lights: LED bulbs (for indoor starts or extending short PNW daylight).
- ● Pruning shears: For shaping plants and removing suckers.
- ● Compost or worm castings: Boost soil fertility (1-2 cups per plant).
- ● pH test kit: Ensure soil pH is 6.0-6.8 (ideal for tomatoes).
How to grow Tiny Tim tomatoes in the Pacific Northwest climate
Here's how I've grown this cold-hardy variety successfully for years—even in chilly Pacific Northwest summers.
🌱 Step 1: Start Seeds Indoors at the Right Time
Begin seeds 8-10 weeks before your last frost date. Tiny Tims need this head start to reach maturity in our shorter growing season. I use 2-3 inch deep biodegradable pots filled with sterile seed-starting mix—never garden soil, which can harbor diseases that will kill young seedlings.
Plant 2-3 seeds per pot at a depth of ¼ inch, then cover lightly with additional mix. The reason we sow more than one seed is that Tiny Tims sometimes have uneven germination. Mist the surface gently until the soil looks evenly moist but not soggy. Place the pots in a warm spot (75-85°F)—a seedling heat mat helps tremendously in our cool homes.
Keep the soil consistently moist (not wet) until germination, which typically occurs in 7-14 days. Here's the thing—if your home stays cooler than 70°F, germination may take longer. Don't give up if sprouts don't appear right away; Tiny Tims are tough but need warmth to start.
☀️ Step 2: Provide Proper Light and Harden Off Seedlings
The instant those first true leaves appear (not the initial seed leaves), move seedlings to 14-16 hours of bright light daily. A south-facing window rarely provides enough intensity, so I use a full-spectrum LED grow light positioned 2-4 inches above the plants. You'll know your light is working if seedlings grow compact and dark green rather than leggy and pale.
Two weeks before transplanting outdoors, start hardening off your seedlings. Place them outside in a sheltered spot for 1-2 hours the first day, gradually increasing their time outdoors by 1 hour daily. By the time they're ready for the garden, they should tolerate a full day outside without wilting. This step is critical—Tiny Tims handle cold better than heat stress.
Watch for first true leaves (the second set after the initial seed leaves) as your signal to begin this process. These leaves indicate the plant has established its true growth pattern and can handle more challenging conditions.
🪴 Step 3: Transplant to the Garden with Care
Choose a location with full sun (6+ hours daily) and well-draining soil. Tiny Tims thrive in our Pacific Northwest climate but need protection from late spring frosts. I plant them after all danger of frost has passed—usually mid-May to early June in most of the region.
Dig holes slightly deeper than the seedlings' root balls to encourage strong root growth. Space plants 18-24 inches apart—this gives them room to spread without competing for nutrients. Water deeply at planting to settle the soil around the roots, then mulch with 2-3 inches of straw to retain moisture and regulate soil temperature.
Here's where it gets fun—watch for first flowers to appear 6-8 weeks after transplanting. These early blooms often get nipped by late frosts, but don't worry. Tiny Tims are prolific and will produce more flowers as the season progresses. Remove any early flowers if frost is forecasted to protect your main crop.
💧 Step 4: Maintain Through the Growing Season
Water deeply 1-2 times per week, aiming for 1 inch of water per week. Tiny Tims are drought-tolerant once established, but consistent moisture produces the best fruit. I water in the early morning to reduce evaporation and fungal risks. You'll know your watering is right when the soil feels dry to touch 1-2 inches down between waterings.
Fertilize lightly with a balanced organic fertilizer (10-10-10) every 4-6 weeks after transplanting. Too much nitrogen produces leafy growth at the expense of fruit. I also side-dress with compost mid-season to provide slow-release nutrients. Tiny Tims respond well to organic matter but don't need heavy feeding.
Watch for first ripe tomatoes appearing 70-80 days after transplanting. These tiny, sweet fruits are the reward for your patience. Harvest regularly to encourage more production—overripe tomatoes on the vine slow down new flower development.
✂️ Step 5: Extend the Season with Proper Care
As temperatures drop in late summer, protect your Tiny Tims from early frosts. I use row covers or cold frames to extend the harvest season by 2-4 weeks. These plants can tolerate light frosts (28-32°F), but a hard freeze will kill them. Remove protective covers during the day to allow pollination and bring them back at night.
Prune suckers (the small shoots that grow in the leaf axils) to direct the plant's energy toward fruit production. Tiny Tims are indeterminate, so they'll keep growing and producing if given the chance. I also remove any yellow or diseased leaves immediately to prevent the spread of problems.
Real talk: Your Tiny Tims might produce through the first frost if you're lucky. I've had plants still flowering in October with proper care. The key is keeping them healthy and protected as long as possible—these tomatoes are worth the effort!
Tips & tricks for perfect Tiny Tim tomato flowers
These simple tricks will help you coax the most vibrant blooms from your cold-hardy Tiny Tims—even in our unpredictable Pacific Northwest weather.
Germination Warmth: That 75-85°F temperature range for seed starting is non-negotiable in our cool homes. I learned this the hard way after watching seeds sit for three weeks without sprouting. If your home stays below 70°F, place pots on a seedling heat mat or move them to a sunny windowsill with a clear plastic dome to trap warmth. The moment you see those first true leaves, you'll know your patience paid off.
Lighting Strategy: The 14-16 hours of bright light requirement is where most beginners stumble. A south-facing window simply won't cut it—seedlings will stretch toward the light and become leggy. I use a full-spectrum LED grow light on a timer, positioned just 2-4 inches above the plants. If your seedlings start looking pale and stretched, they're begging for more light. This is especially critical in our overcast Pacific Northwest summers where natural sunlight can be deceivingly weak.
Transplanting Depth: Digging holes slightly deeper than the root ball might seem counterintuitive, but it's a game-changer for Tiny Tims. The extra depth encourages the plant to send out more roots downward, creating a stronger foundation for our windy coastal conditions. When planting, make sure the top of the root ball sits just below soil level—this prevents stem rot while promoting root growth. The 18-24 inch spacing gives each plant room to thrive without competing for nutrients, which is crucial in our nutrient-rich but sometimes crowded garden beds.
Frost Protection: Those 28-32°F frost tolerance limits are real, but don't let early frosts discourage you. I've extended harvests by 2-4 weeks using lightweight row covers during nighttime temperature drops. The key is removing covers during the day to allow pollination—bees need access to those tiny flowers! For late-season protection, I also use cold frames that create a microclimate warm enough for continued growth. This simple technique can mean the difference between a harvest that ends in September versus one that stretches into October.
Pro Tips for Tiny Tim Tomato Flower
- These simple tricks will help you coax the most vibrant blooms from your cold-hardy Tiny Tims—even in our unpredictab...
- Germination Warmth: That 75-85°F temperature range for seed starting is non-negotiable in our cool homes. I learned t...
- Lighting Strategy: The 14-16 hours of bright light requirement is where most beginners stumble. A south-facing window...
Frequently asked questions
Got questions about growing Tiny Tim tomato flowers in the Pacific Northwest? You’re not alone! Here are some of the most common queries—and their answers—to help you cultivate this frost-resistant beauty with confidence.
Why does my Tiny Tim tomato plant have flowers but no fruit?
This is often due to temperature stress—Tiny Tim tomatoes thrive in cooler climates but may drop flowers if nights dip below 55°F (13°C). Ensure consistent moisture (but avoid soggy soil) and protect plants from sudden cold snaps with row covers. Pro tip: Hand-pollinate flowers with a small brush if bees are scarce!
Can Tiny Tim tomatoes survive light frost?
Yes! This variety is one of the most frost-tolerant tomatoes—young plants can handle 28°F (-2°C) for short periods. However, flowers and fruit are frost-sensitive. Use frost cloth or mulch heavily to protect blooms. Once fruit sets, keep plants covered until spring’s last frost.
When is the best time to harvest Tiny Tim tomatoes?
Harvest when tomatoes turn deep red and slightly soft to the touch, usually 60–70 days after transplanting. In the PNW’s cooler climate, they may ripen slower—check daily in late summer/fall. Don’t wait too long! Overripe tomatoes split easily.
What’s a good alternative if Tiny Tim flowers don’t thrive?
If your Tiny Tim struggles, try these frost-tolerant tomato varieties:
- ‘Stupice’ – Ultra-hardy, produces fruit in 50°F (10°C)!
- ‘Mountain Merit’ – Disease-resistant and cold-resistant.
- ‘Cherokee Purple’ – Heirloom with better cold tolerance than most.
All three handle PNW’s variable weather better than heat-loving varieties.
How can I boost pollination for Tiny Tim tomato flowers?
If bees are scarce (common in early spring or rainy PNW weather), hand-pollinate:
- Gently tap flower clusters with a small paintbrush or cotton swab.
- Or, use a soft artist’s brush to transfer pollen from one flower to another.
- Do this early morning when flowers are open.
For extra help, plant pollinator-friendly flowers nearby, like borage or marigolds!
Wrapping up and next steps
The Tiny Tim tomato flower is a true gem for Pacific Northwest gardeners—its cold-hardy charm and vibrant blooms make it a must-have for any floral enthusiast. Whether you're a seasoned gardener or just starting, this resilient beauty rewards patience with stunning results. 🌸
Ready to bring its magic to your garden? Start by gathering your supplies and follow the planting tips shared above. Soon, you’ll be enjoying a thriving Tiny Tim tomato flower that stands out in your landscape!