Flowers
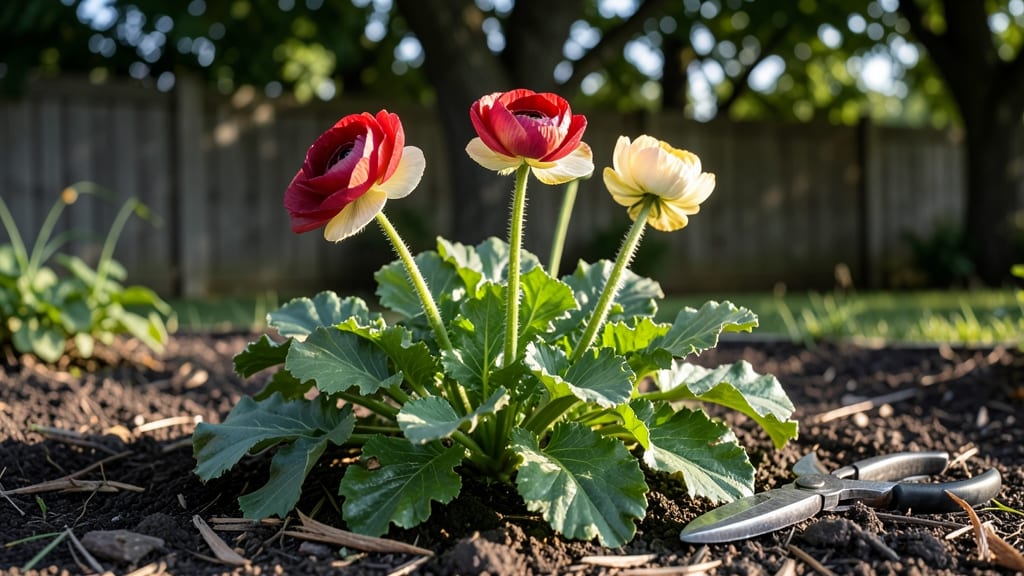
Sun-loving buttercup family flowers bring bold color and effortless charm to gardens—just look at how my delphiniums tower over the border like blue skyscrapers every summer. 🌻 These perennials thrive where others struggle, turning sunny patches into vibrant displays with minimal fuss.
The key is understanding their quirks: some love moist soil while others beg for well-draining beds, and all demand full sun to hit their peak brilliance.
You’ll need a mix of patience and simple care: 6 hours of sunlight daily, rich but not soggy soil, and occasional deadheading to keep blooms coming.
Delphiniums and clematis climb, anemones add whimsical pops of color, and even the humble buttercup (yes, the childhood "don’t pick me" flower) has its place in cottage gardens. The trade-off? Some members are toxic to pets—so keep them out of curious paws.
Imagine your garden in late spring when anemones open like tiny sunflowers, or summer when delphinium spikes reach for the sky. These plants reward you with long bloom seasons and low-maintenance beauty—perfect for cutting gardens or pollinator-friendly borders. Let’s get you growing the right way from day one.
The best part? They pair beautifully with lavender, roses, and grasses, creating drama without the fuss. Whether you’re filling a sunny corner or designing a full border, buttercup family flowers deliver bold color with minimal effort. Ready to transform your space?
📚 In This Guide
- What you need
- Instructions
- Tips and common mistakes
- Wrapping up and next steps
What you need
- ● Seeds or young plants: Buttercup family seeds (e.g., Ranunculus, Delphinium, or Anemone) – 1–2 packets (or 5–10 plants if buying starts).
- ● Pro tip: 💡 Choose native varieties for easier care and pollinator support!
- ● Well-draining soil: Mix 1 part compost with 2 parts garden soil (or use pre-mixed potting soil for containers).
- ● Sunny location: A spot with 6+ hours of direct sunlight daily (partial shade works for some varieties like Anemone).
- ● Watering can or hose: With a gentle spray nozzle to avoid disturbing seeds.
- ● Hand trowel or small shovel (for planting seeds/transplants).
- ● Garden gloves (to protect hands from prickly stems or thorns on some species).
- ○ Mulch (optional): 2–3 inches of straw or shredded bark to retain moisture.
- ○ Fertilizer (optional): A balanced, slow-release granular fertilizer (10-10-10 ratio) or organic options like fish emulsion.
- ○ Container or raised bed (optional): For smaller spaces, use pots with drainage holes (minimum 6-inch depth).
- ○ Plant markers (optional): Labels or sticks to track varieties if planting multiple types.
Step-by-Step guide to cultivating thriving buttercup family flowers
Sun-loving perennials like those in the buttercup family need precise care to flourish. Here’s how to coax their vibrant blooms year after year.
🌱 Step 1: Select and Prepare the Perfect Planting Site
Buttercup family flowers—think clematis, columbine, or aquilegia—thrive in well-draining soil with full sun to partial shade (6+ hours of sunlight daily). Choose a spot with loose, fertile soil; these plants hate soggy roots. If your soil is heavy clay, amend it with 2-3 inches of compost mixed into the top 12 inches before planting. I always test drainage by digging a 6-inch hole, filling it with water, and waiting to see if it drains within 30 minutes. If not, raise the planting area with a mound of soil or add perlite.
These perennials appreciate a slightly acidic to neutral soil pH (6.0–7.0). A simple soil test kit confirms the pH—if it’s off, adjust with sulfur (to lower) or lime (to raise) before planting. Mulch with 2-3 inches of organic mulch (like shredded bark) after planting to retain moisture and suppress weeds. Mulch also protects shallow roots from extreme temperature swings, which buttercup family plants are sensitive to.
☀️ Step 2: Plant at the Right Depth and Spacing
Timing matters: Plant in early spring or fall when soil temperatures are 50–65°F. Buttercup family flowers have delicate root systems, so handle each plant gently by the base, not the stems. Dig holes twice as wide as the root ball but only as deep as the container’s root level—burying too deep suffocates roots. Space plants 12–24 inches apart, depending on the variety (check the tag—some, like columbine, stay compact, while others, like clematis, need more room to sprawl).
Place each plant in the hole, backfill with native soil, and water deeply to settle it. Press the soil lightly around the base to eliminate air pockets, but don’t compact it. A 1-inch layer of mulch around the stem (not touching it) helps regulate soil temperature and reduces evaporation. Water again after planting to encourage root contact with the soil. Here’s the thing—overwatering at this stage can drown roots, so let the top 1–2 inches of soil dry between waterings for the first week.
💧 Step 3: Water and Fertilize for Lush Growth
Buttercup family flowers need consistent moisture, especially during their first growing season. Water deeply once a week (or more in extreme heat) to encourage deep root growth. Aim for 1–1.5 inches of water per week, delivered at the soil level—not overhead. Overhead watering can spread fungal spores, which these plants are prone to. I use a soaker hose or drip irrigation to deliver water slowly at the base, mimicking natural rainfall.
Fertilize lightly in early spring with a balanced, slow-release fertilizer (10-10-10 or similar). Too much nitrogen leads to lush foliage but fewer blooms—these flowers prioritize vibrant blooms over leafy growth. After the first flush of flowers, apply a low-phosphorus fertilizer (like 5-10-5) to encourage more blooms. Stop fertilizing in late summer to allow plants to harden off for winter. Always water fertilizer into the soil to prevent root burn.
✂️ Step 4: Prune and Maintain for Long-Term Beauty
Deadhead spent blooms regularly to encourage continuous flowering. Snip off faded flowers just above a set of healthy leaves or buds—this redirects the plant’s energy into producing new blooms instead of seed pods. For clematis, prune in early spring by cutting back the previous year’s growth to 2–3 feet tall, depending on the variety. This promotes bushier growth and more flowers. For columbine, simply trim back leggy stems after flowering to maintain shape.
In late fall, cut back dead or damaged foliage but leave 3–6 inches of stem on perennials like aquilegia. This protects the crown from freezing temperatures and allows new growth to emerge earlier in spring. Avoid heavy pruning in fall—it stresses plants and reduces their winter hardiness. Mulch again with 2–3 inches of organic material to insulate roots through cold months. Here’s where it gets fun: Watch for new growth in early spring—that’s your signal the plant survived winter and is ready to thrive again.
🌿 Step 5: Divide and Propagate for a Bountiful Display
Buttercup family flowers benefit from division every 3–4 years to rejuvenate growth. Dig up clumps in early spring or fall, separate into smaller sections with 3–5 stems each, and replant immediately. This prevents overcrowding, which leads to fewer blooms and weaker stems. I always divide in cool, cloudy weather to reduce stress on the plants. Water divisions deeply after replanting and keep the soil moist for the first 2–3 weeks to encourage root establishment.
You can also propagate from seed or cuttings. For seeds, sow in late fall or early spring directly in the garden—these flowers often self-seed readily. For cuttings, take 4–6 inch stems in early summer, remove the lower leaves, and dip in rooting hormone. Plant in a moist potting mix and keep humid until roots form (usually 4–6 weeks). This is how I expand my garden without spending a dime—just a little patience and the right timing.
Tips & tricks for perfect buttercup family flower cultivation
These sun-loving perennials reward patience with stunning blooms—here’s how to give them the best possible start.
Soil Preparation Secret: The 30-minute drainage test in Step 1 is non-negotiable. If your soil doesn’t drain properly, consider creating raised beds—this prevents root rot and gives delicate buttercup family roots the aeration they crave. I’ve seen clematis thrive in containers with fast-draining mixes of compost and perlite when planted in heavy clay.
Planting Depth Insight: When planting in Step 2, resist the urge to bury plants deeper than their root level—this is a common mistake that suffocates roots. For varieties like aquilegia, which have shallow root systems, I often mound extra soil around the sides rather than packing it deep. The goal is to keep the crown just above soil level while ensuring stability.
Watering Wisdom: The once-weekly watering guideline in Step 3 works for average conditions, but adjust for your climate. In my zone 5 garden, I water twice weekly during summer’s peak heat. The key is maintaining that 1–1.5 inches of water—use a rain gauge or tuna can to measure accurately. Overhead watering spreads disease, so I’ve invested in a simple drip irrigation system that delivers water exactly where the roots need it.
Pruning Precision: For clematis specifically, the 2–3 feet pruning height in Step 4 requires understanding your variety’s growth habit. Group 1 clematis (early bloomers) should be pruned lightly in early spring, while Group 3 (late bloomers) can be cut back more aggressively. I mark my pruning shears with masking tape at the correct height to avoid over-pruning—this simple trick has saved me from accidentally removing too much growth.
Pro Tips for Buttercup Family Flower
- These sun-loving perennials reward patience with stunning blooms—here’s how to give them the best possible start.
- Soil Preparation Secret: The 30-minute drainage test in Step 1 is non-negotiable.
- Planting Depth Insight: When planting in Step 2, resist the urge to bury plants deeper than their root level—this is a common mistake that suffocates roots.
Frequently asked questions
Got questions about growing buttercup family flowers? You're not alone! Here are some of the most common queries—plus straightforward answers to help you cultivate these cheerful perennials with confidence.
What are the easiest buttercup family flowers to grow for beginners?
Start with Ranunculus or Delphinium—both are hardy, sun-loving, and thrive in well-drained soil. Anemone is another great choice for low-maintenance blooms. Avoid Helleborus (Lenten rose) if you’re new; it prefers shade and can be finicky.
How long does it take for buttercup family flowers to bloom after planting?
Timing varies! Most varieties bloom within 6–12 weeks of planting, but perennials like Ranunculus may take 2–3 years to reach full maturity. Annuals (e.g., Iceland Poppy) often flower in 8–10 weeks from seed. Patience pays off—these flowers reward persistence!
Can buttercup family flowers grow in partial shade?
While they love full sun (6+ hours/day), some varieties tolerate partial shade. Helleborus and Anemone do well in dappled light, but expect fewer blooms. For vibrant colors, prioritize sunny spots—especially for Delphinium or Ranunculus.
Why aren’t my buttercup flowers blooming? Troubleshooting tips.
Check these common culprits:
- Not enough sun: Move to a sunnier spot.
- Over-fertilizing: Too much nitrogen = leafy growth, no flowers. Use a low-nitrogen bloom booster instead.
- Poor soil drainage: Amend clay soil with compost or sand.
- Deadheading delay: Snip spent blooms to encourage new flowers.
Still struggling? Your plant might need a winter rest—some varieties bloom in spring or fall only.
What’s a great alternative if buttercup flowers don’t thrive in my climate?
Try these sun-loving, low-maintenance swaps:
- Black-eyed Susan (Rudbeckia) – Drought-tolerant and cheerful.
- Coneflower (Echinacea) – Pollinator magnet with long bloom seasons.
- Blanket Flower (Gaillardia) – Thrives in heat and poor soil.
All three are perennial, sun-happy, and just as vibrant!
Wrapping up and next steps
The buttercup family flowers bring joy, color, and resilience to any garden—whether you're a seasoned gardener or just starting out! 🌼 From their vibrant blooms to their hardy nature, these sun-loving perennials prove that beauty thrives with the right knowledge and care.
Now that you’re equipped with the essentials, it’s time to get your hands dirty and watch your garden transform!
💡 Next step: Pick your favorite variety, grab your tools, and start planting—your future garden will thank you! Share your progress or ask questions in the comments; we’d love to see (and help) your buttercup family blooms flourish! 🌿