Flowers
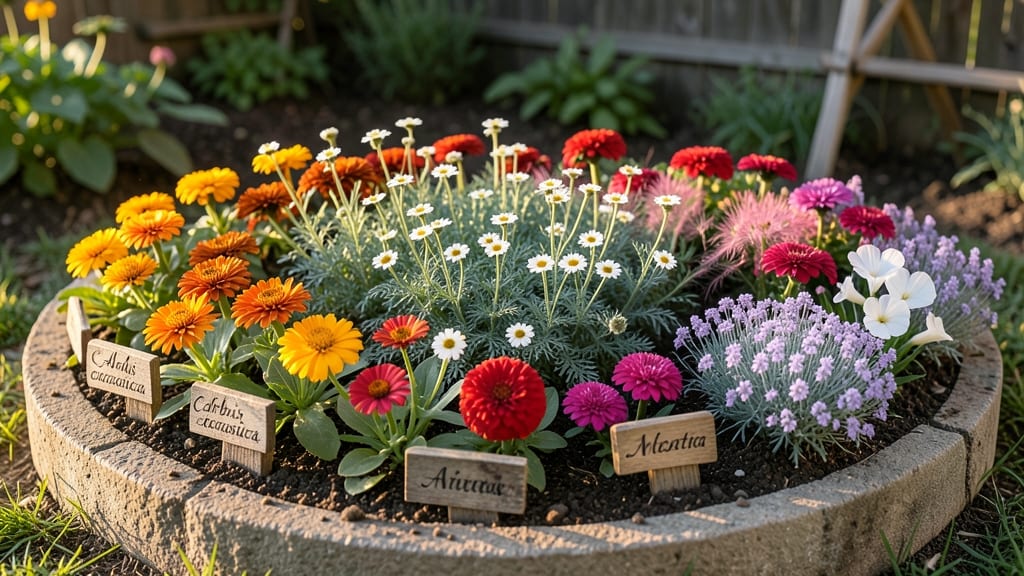
A flower clock project turns your garden into a living timepiece where each bloom marks the hour. 🌸 I built mine after realizing how much fun it was to track flower cycles—now my guests actually check the time by watching petals unfurl.
The magic happens when you pair plants with precise bloom windows, creating a visual schedule that doubles as art.
You’ll need 12 distinct flowering plants, a circular container or in-ground plot, and a simple clock face template. Annuals like morning glories and evening primrose work best for dramatic shifts, but perennials like daylilies add long-term charm.
The soil should drain well but hold moisture—think equal parts potting mix and compost—and place your clock where it gets 6+ hours of sun daily.
By noon, your clock will be buzzing with activity: early bloomers like poppies will fade while afternoon stars like zinnias burst open. Kids love guessing which flower "tells" the time, and you’ll notice how pollinators follow the schedule too.
The best part? Every season reveals new pairings—spring bulbs for dawn, summer annuals for midday, and fall mums for golden hour.
For creative twists, try a vertical clock on a trellis or a hanging basket version with trailing flowers. Just remember: the key is staggered blooms, not perfect symmetry. Even if some flowers overlap, the concept works—it’s all about celebrating nature’s rhythm. Let’s get those petals synchronized!
📚 In This Guide
- What you need
- Instructions
- Tips and common mistakes
- Wrapping up and next steps
What you need
- ● Artificial or real flowers (12–24 stems, varying colors for contrast—think bold reds, sunny yellows, or deep purples!)
- ● Clock face template (printable or hand-drawn, 12–18" diameter; free templates available online!)
- ● Thick cardboard or foam board (1 sheet, 22" x 28" or larger for stability)
- ● Hot glue gun + glue sticks (or strong craft adhesive for delicate petals)
- ● Scissors or craft knife (for precise cuts—safety first!)
- ● Black acrylic paint + paintbrush (to outline clock numbers/hands)
- ● Floral wire or thin branches (for securing flowers to the clock face)
- ● Ruler + pencil (for marking clock positions)
- ● Hole punch (to attach a dowel or hanger)
- ○ Clear sealant spray (optional, to protect your masterpiece from weather)
- ○ LED tea lights or solar-powered lights (optional, for a glowing nighttime clock!)
- ○ Printed clock hands (optional, if you want movable hour/minute markers)
- ● A sunny workspace (natural light helps with color accuracy!)
- ● Patience—this project is all about precision and creativity!
- ● Basic crafting skills (or a willingness to learn—no pressure!)
Step-by-Step instructions for crafting a flower clock
Turn your green thumb into a timekeeper with this creative, functional garden art!
🌱 Step 1: Design Your Clock Face Layout
Sketch a 12-inch diameter circle on paper to map your clock face—this will be your template. Use a ruler to mark 12 evenly spaced hour points around the circle, each 1 inch apart. Here's the thing—each hour will correspond to a different blooming flower variety, so research plants with staggered bloom times. For example, morning glories open at dawn, while evening primrose blooms at dusk.
Label each hour point with the plant name and its peak bloom time. I like to use waterproof markers on a plastic plate as my base template—it's sturdy and won't warp when exposed to moisture. Pro tip: Add a small 1-inch diameter circle at each hour point to indicate where the plant's center will sit. This precision ensures your clock stays balanced and accurate.
🪴 Step 2: Prepare Your Base and Plant Containers
For a 4-hour clock (one for each season), you'll need 4 identical containers—I recommend 6-inch diameter ceramic pots with drainage holes. Place a 4-inch layer of gravel at the bottom of each pot to improve drainage. Here's what I do: Fill each pot ¾ full with lightweight potting mix, leaving room for roots to expand. Press the soil down gently but firmly—you want it compact enough to hold plants steady but loose enough for roots to breathe.
Use the plastic plate template to mark the center of each pot with a pencil. This ensures your clock face remains symmetrical. For the clock's base, I like using a large, flat stone or wooden slab—it provides stability and a natural look. If you're using a stone, drill 4 small holes to secure your pots in place with landscape stakes.
☀️ Step 3: Select and Plant Time-Specific Flowers
Choose 4-6 flower varieties with staggered bloom times to create your clock. For example, sunflowers (morning), marigolds (afternoon), evening primrose (evening), and moonflowers (night). Plant 1-2 seeds per hour point—this gives you backup if some don't germinate. Use the template to space seeds ½ inch deep and 1 inch apart at each marked hour point.
Water gently but thoroughly after planting—soak the soil until water runs out the drainage holes, then let it drain completely. Place your pots in a sunny location (at least 6 hours of direct sunlight daily). Here's the moment that matters: Once seedlings emerge, thin them to 1 strong plant per hour point. Use scissors to snip weak seedlings at soil level—this prevents disturbing the roots of the plants you're keeping.
⏰ Step 4: Maintain Bloom Times and Adjust as Needed
Monitor each plant's bloom time closely. If a flower opens earlier or later than planned, swap it with another plant on the clock. For example, if your evening primrose blooms at 7 PM instead of 8 PM, move it to the 7 o'clock position. This flexibility keeps your clock accurate. Water deeply every other day—1 cup per pot—but adjust based on weather. In hot, dry conditions, you might need to water daily.
Fertilize lightly every 4 weeks with a balanced, water-soluble fertilizer (like 10-10-10). Here's where it gets fun—watch as your clock "runs" with petal precision! If a plant stops blooming, check its light exposure. Some flowers, like moonflowers, need partial shade in the afternoon to bloom at night. Adjust their position if needed, and your clock will stay on "time."
Tips & tricks for perfect flower clock projects
Here's what nobody tells you about creating a flower clock that actually keeps time!
Precision is Everything: When marking your 12-inch diameter circle in Step 1, use a compass for perfect circles—it's worth the small investment. I learned this the hard way after ruining three templates with freehand circles. For the hour points, use a protractor to ensure they're exactly 30 degrees apart (1 inch apart on a 12-inch circle). This mathematical precision ensures your clock face is symmetrical and accurate.
Container Consistency Matters: In Step 2, don't skimp on identical containers—even slight size variations can throw off your clock's balance. I recommend using the same brand and model of ceramic pots for all four seasons. For the 4-inch gravel layer, use clean river rocks rather than decorative pebbles—they drain better and won't decompose. This drainage layer is critical for preventing root rot, which can throw off your entire bloom schedule.
Seed Selection Strategy: For Step 3, research your local climate zone before selecting flowers—the bloom times in the instructions are based on temperate climates. In hotter zones, you might need heat-tolerant varieties like zinnias for afternoon hours. I always plant extra seeds (the 1-2 per hour point) because germination rates vary wildly between varieties. Keep a planting log with bloom predictions to track which flowers consistently meet their time slots.
Light Management Tip: The 6 hours of direct sunlight mentioned in Step 3 is a minimum—more is better for consistent blooming. If you're in a northern latitude, consider using grow lights for 2-3 hours in the morning to supplement winter sunlight. For moonflowers, which need partial shade in the afternoon, use a sheer curtain to filter light during peak afternoon hours (around 2-4 PM). This light management is what keeps your clock running smoothly through all seasons.
Pro Tips for Flower Clock Project
- Here's what nobody tells you about creating a flower clock that actually keeps time!
- Precision is Everything: When marking your 12-inch diameter circle in Step 1, use a compass for perfect circles—it's worth the small investment.
- Container Consistency Matters: In Step 2, don't skimp on identical containers—even slight size variations can throw off your clock's balance.
Frequently asked questions
How long does it take to build a flower clock?
A basic flower clock can take 4–8 hours for beginners, depending on complexity. Simple designs (like a single dial with 12 flowers) may finish in a weekend, while intricate ones with multiple layers or moving parts could require 2–3 weekends. Plan ahead—some flowers (like sunflowers) grow faster, while others (like roses) need time to bloom symmetrically.
Can I use artificial flowers instead of real ones?
Artificial flowers are a great alternative if you want a low-maintenance clock. Opt for weather-resistant silk or plastic blooms with sturdy stems. They won’t wilt, but ensure they’re UV-protected to prevent fading. For a hybrid approach, mix real flowers (like marigolds for the "numbers") with faux ones for durability.
How do I adjust the clock for seasonal changes?
Flower clocks rely on sunlight and bloom cycles, so seasonal shifts are inevitable. To adapt:
- Spring/Summer: Use sun-loving flowers (e.g., daisies, zinnias) for bright hours.
- Fall/Winter: Swap to late-bloomers (e.g., chrysanthemums, pansies) or add LED lights for nighttime visibility.
- Pro Tip: Keep a backup "clock" with artificial flowers for consistency.
Will bees or pests ruin my flower clock?
Bees and pests are a common concern, but you can minimize damage with these tricks:
- Avoid strongly fragrant flowers (like lavender) near the clock’s "numbers" to deter bees.
- Use pest-resistant varieties (e.g., snapdragons, petunias) or spray neem oil lightly.
- Add a physical barrier like fine mesh over the clock’s base if needed.
What’s the best way to fix a wobbly or misaligned clock?
Even the best flower clocks can lose precision over time. Try these fixes:
- Loosen and retighten the base stakes or screws securing the clock’s frame.
- Use bending-resistant flowers (like gladiolas) for the "hour markers" to reduce sway.
- Add weighted supports (e.g., small rocks in the planter base) for stability.
- Realign daily by gently adjusting stems—it’s like tuning a musical instrument!
Wrapping up and next steps
The Flower Clock Project isn’t just a creative way to track time—it’s a beautiful blend of art, science, and nature that brings your garden to life! 🌸⏱️ Whether you’re a DIY enthusiast or a gardening pro, this project teaches patience, precision, and the joy of hands-on crafting.
Your blooming timepiece will spark conversations and add a touch of whimsy to any outdoor space.
Ready to turn your green thumb into a green-thumb timekeeper? Start small—pick one flower type or experiment with a mini version before tackling a full-scale masterpiece. Then, share your progress with fellow plant lovers online or invite friends to admire your petal-perfect clock!
The world needs more gardens that tell time with style.