Tools
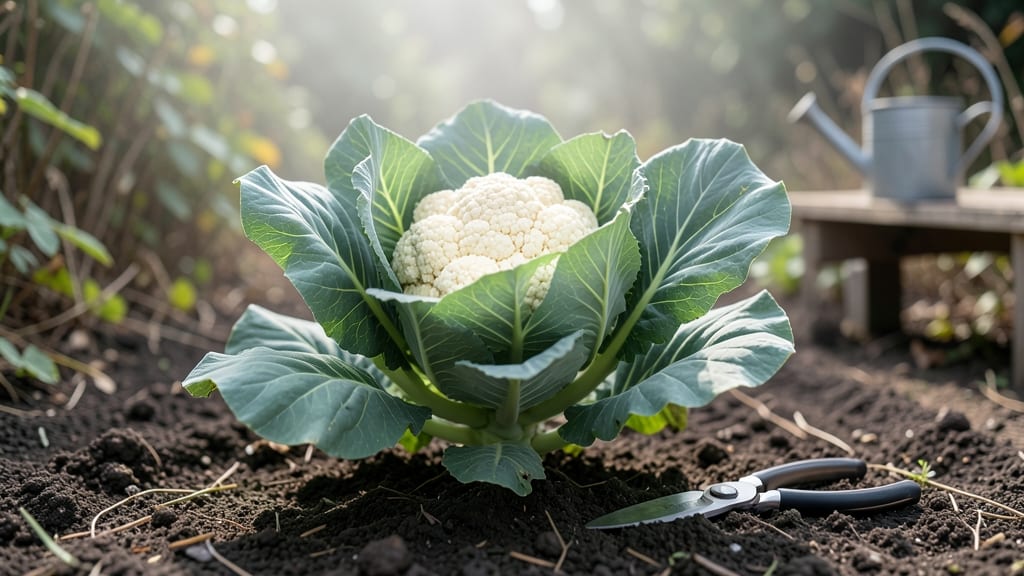
Growing cauliflower in the garden delivers that shockingly lush, pale-green crown you’ve always wanted—if you nail the timing, soil, and a little trick with the heads.
I’ve grown mine from seed for three years now, and the secret isn’t fancy equipment but consistent moisture and a cool-season schedule that most gardeners miss. That first harvest, still warm from the soil, is worth every minute of patience.
The real magic happens in 60-degree soil, where seeds sprout reliably and young plants thrive without bolting. You’ll need a sunny spot with at least 6 hours of sunlight daily, well-draining soil amended with compost, and a steady watering routine—cauliflower hates drying out.
Start seeds indoors 6-8 weeks before your last frost, then transplant when they’re sturdy enough to handle outdoor conditions. The payoff? Heads that form tight and uniform, not loose and scraggly.
By day 90, you’ll be harvesting 10-inch curds that stay crisp when blanched or roasted. The key is watching for yellowing leaves (a sign of bolting) and pests like cabbage worms—but with a few simple organic sprays, you’ll keep them at bay.
Even if your first heads split, don’t give up: cauliflower is forgiving once you understand its quirks. The garden’s best-kept secret is just around the corner.
Works in zones 3-10, though cooler climates get two harvests a year. For advanced gardeners, try purple cauliflower or broccolini—same care, different flavors. Here’s how to make it foolproof, even if you’ve struggled before.
📚 In This Guide
- What you need
- Instructions
- Tips and common mistakes
- Wrapping up and next steps
What you need
- ● Cauliflower seeds: Choose hybrid varieties like ‘Snowball Y Improved’ or ‘Purple of Sicily’ (60-100 seeds, depending on desired yield).
- ● Seed-starting mix: 10-15 lbs of sterile, well-draining potting soil (or coco coir for eco-friendly options).
- ● Garden soil: 1-2 cubic yards of loamy, fertile soil with a pH of 6.0–7.0 (test your soil or amend with compost/peat moss).
- ● Compost or organic fertilizer: 5-10 lbs of balanced 10-10-10 or low-nitrogen options like fish emulsion (avoid high-nitrogen to prevent leafy growth over heads).
- ● Mulch: 2-3 inches of straw or wood chips to retain moisture and suppress weeds.
- ● Garden trowel or transplanting spade: For digging seed holes (6-inch depth).
- ● Garden gloves: A pair of durable, breathable gloves to protect your hands.
- ● Watering can or hose with a gentle nozzle: Cauliflower needs 1–1.5 inches of water per week (drip irrigation works best).
- ○ Row cover or frost cloth: Optional but helpful for young plants in cool climates (3x4 ft per 10 plants).
- ● Pruning shears: For trimming yellowed leaves or harvesting side shoots.
- ● Sunlight: A full-sun location (6–8 hours daily)—cauliflower is a sun-worshipper!
- ● Spacious planting area: Space plants 18–24 inches apart in rows 30 inches apart to allow airflow.
- ● Cool-season timing: Start seeds 4–6 weeks before last frost (indoors) or direct-sow when soil is 40–50°F.
- ● Patience: Cauliflower takes 70–90 days to mature—plan ahead!
Step-by-step instructions for growing cauliflower in the garden
Here’s how to grow head-sized cauliflower with consistent, tight curds—no more bitter, loose heads.
🌱 Step 1: Time Your Planting for Cool Seasons
Cauliflower thrives in 50-70°F soil and air, so plant 6-8 weeks before your last frost date in spring or 60-80 days before the first fall frost. If your summers are scorching, opt for fall planting—cauliflower bolts (goes to seed) when days exceed 80°F. I’ve found that starting seeds indoors 4-6 weeks before transplanting gives them a head start, especially in cooler climates.
Direct-sow seeds ¼ inch deep in well-drained soil enriched with compost. Space seeds 18 inches apart in rows 24 inches apart—crowding leads to poor air circulation and disease. Thin seedlings to the strongest plant per spot once they’re 4 inches tall, using sharp scissors to avoid damaging roots. The goal is strong, single-stemmed plants with no competition.
☀️ Step 2: Provide Consistent Moisture and Shade for Early Growth
Cauliflower needs even moisture to form tight heads—never let the soil dry out. Water deeply 1-2 times per week, aiming for 1 inch of water per week, and more during head formation. I mulch with 2-3 inches of straw right after transplanting to retain moisture and keep roots cool. Without consistent water, heads split or develop loose, misshapen curds.
Young plants need partial shade (30-50% coverage) if your summers are hot. Use floating row covers or shade cloth until they’re 6 inches tall. This prevents bolting and ensures the plant focuses energy on head development. Watch for yellowing leaves—a sign of stress from too much sun or uneven watering. Adjust shading immediately if you see this.
🌿 Step 3: Tie Heads for Uniform Growth and Prevent Bolting
When cauliflower heads reach 2-3 inches in diameter, they’ll start to form a tight curd. This is the moment that matters: tie the head with a soft cloth or rubber band to keep it compact and white. I use old fabric strips—just wrap loosely around the head and secure it to the main stem. This prevents the head from opening to sunlight, which turns it yellow and bitter.
If your plants start to bolt (send up a tall flower stalk), cut off the main stem below the head and let the plant regrow side shoots. These smaller heads won’t be as large, but they’re still edible. Bolting usually happens when days get too long or hot—so if you’re in a warm climate, focus on fall planting to avoid this issue entirely.
✂️ Step 4: Harvest at Peak Maturity for Tender, Flavorful Curds
Harvest cauliflower when the head is firm, compact, and just before the buds open. For white varieties, this is when the curd is 3-5 inches wide and still tightly closed. For purple or orange varieties, harvest when the color deepens but the head remains firm. Use a sharp knife to cut the stem 1-2 inches below the head—leave the outer leaves intact to protect the plant.
Don’t wait too long, or the head will turn yellow, woody, and tough. After harvest, the plant may produce small side shoots—these can be harvested later for smaller curds. If you’re growing multiple plants, space harvests 2-3 days apart to extend your season. Store harvested cauliflower in the fridge for 5-7 days or blanch and freeze for long-term use.
Tips & tricks for perfect garden-grown cauliflower
These practical strategies will help you grow restaurant-quality cauliflower heads with tight curds and vibrant flavor.
Climate Timing is Everything: The 6-8 week window before your last frost date isn't just a suggestion—it's when cauliflower's natural growth cycle aligns with your region's cooling temperatures. I've seen gardeners in Zone 5 get perfect heads by planting in early May, while those in Zone 9 should focus on fall planting to avoid the 80°F+ heat that triggers bolting. Use your local frost dates as your guide, but be ready to adjust by 1-2 weeks if your spring arrives unusually early or late.
Soil Preparation Makes All the Difference: Before planting, work in 2-3 inches of well-aged compost or a balanced organic fertilizer (like 5-5-5) into the top 12 inches of soil. Cauliflower is heavy feeders and need consistent nutrients to form those tight heads. I also recommend adding a handful of greensand or kelp meal to provide potassium, which helps prevent head splitting—a common problem when plants get too much nitrogen. The goal is soil that's rich but not overly fertile, which can lead to leafy growth at the expense of the head.
Head Tying Technique Revisited: When you reach Step 3 and see those 2-3 inch heads forming, don't just tie them—create a little shade tent. Wrap the cloth or rubber band loosely around the head, then fold the outer leaves upward to create a mini greenhouse effect. This keeps the head white and compact while allowing airflow to prevent rot. I've found that using a soft cotton fabric works better than plastic wrap, which can trap too much moisture and cause the head to split.
Harvesting at the Perfect Moment: The 3-5 inch width guideline is your target, but don't rely solely on size—check the buds. When they're still tightly closed but showing color (for white varieties, this means pale yellow-green), that's your harvest window. I've learned to harvest in the morning when the heads are firmest, using a sharp knife to cut just below the head. This clean cut helps prevent disease from entering the plant through jagged edges, and the outer leaves you leave intact act as natural protection for any side shoots that might form later.
Pro Tips for Cauliflower In The Garden
- These practical strategies will help you grow restaurant-quality cauliflower heads with tight curds and vibrant flavor.
- Climate Timing is Everything: The 6-8 week window before your last frost date isn't just a suggestion—it's when cauli...
- Soil Preparation Makes All the Difference: Before planting, work in 2-3 inches of well-aged compost or a balanced org...
Frequently asked questions
Got questions about growing cauliflower in your garden? You’re not alone! Here are some of the most common concerns—plus straightforward answers to help you grow like a pro.
How long does cauliflower take to grow from seed?
Most cauliflower varieties mature in 70–90 days from transplanting (or 100–130 days from seed). Cool-season types like ‘Snowball’ or ‘Purple of Sicily’ are faster, while larger heads (like ‘Romanesco’) take longer. Start seeds indoors 4–6 weeks before your last frost for a head start!
What’s the best temperature for growing cauliflower?
Cauliflower thrives in cool weather—ideal temps are 60–70°F (15–21°C) during the day and 50–55°F (10–13°C) at night. Avoid planting when temps exceed 80°F (27°C), as heat causes bolting (premature flowering). Use shade cloth in hot climates to protect young plants.
What pests or diseases should I watch for?
Keep an eye out for cabbage worms, aphids, and flea beetles—they love munching on leaves. Cruciferous diseases like clubroot or black rot can also strike. Prevent issues with row covers, neem oil, or companion planting (try onions or thyme). Rotate crops yearly to reduce soil-borne pathogens.
Can I grow cauliflower in containers or small spaces?
Dwarf varieties like ‘Mini Purple’ or ‘Purple of Sicily’ work well in 5–7 gallon containers with at least 12–18 inches of depth. Use a well-draining potting mix and place pots in full sun. Just ensure your container stays consistently moist—cauliflower hates drying out!
Why isn’t my cauliflower forming a head?
Head formation often stalls due to heat stress, poor nutrition, or overcrowding. If your plant bolts (sends up a flower stalk), it’s likely too warm. Try tying leaves over the head to block sunlight (blanching) and ensure even watering. A balanced fertilizer (high in nitrogen early, then phosphorus/potassium) can also help.
Wrapping up and next steps
Growing cauliflower in your garden is a rewarding journey that pays off with delicious, homegrown harvests—and yes, it can be done in just 90 days! 🌱 Whether you're a beginner or a seasoned gardener, these tips and tricks will help you master the art of cultivating this versatile veggie while troubleshooting common challenges along the way.
Now that you’re armed with the right knowledge, roll up your sleeves and get planting!
Start with healthy seeds, keep an eye on your plants, and soon enough, you’ll be enjoying crisp, creamy cauliflower straight from your garden. Ready to dive deeper? Check out our step-by-step planting guide or explore creative ways to cook your harvest—your future meals will thank you!