Flowers
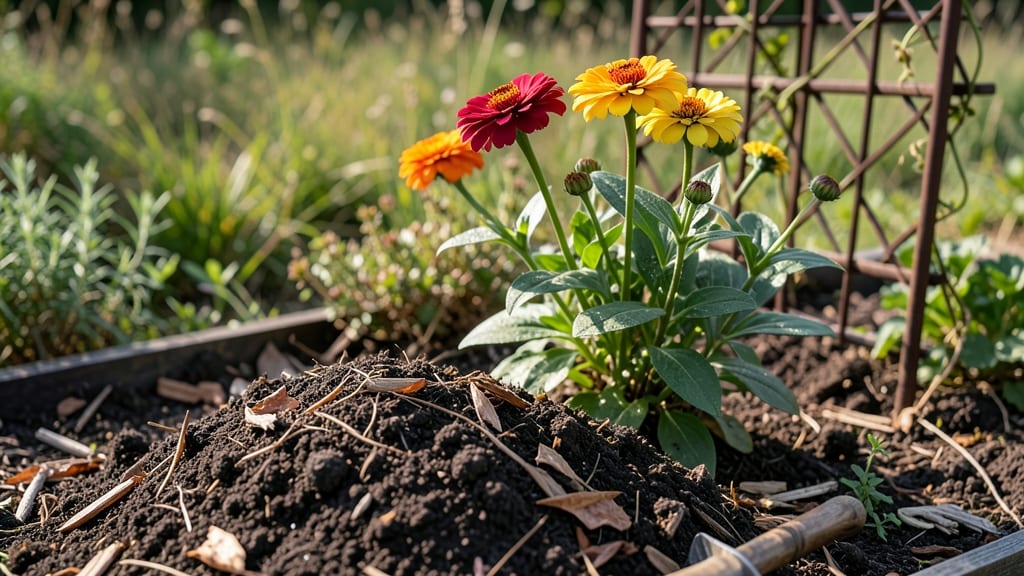
Your flower beds could be shockingly lush this season—compost for planting flowers is the secret weapon behind vibrant blooms that last all summer. 🌸 I learned the hard way that store-bought soil just doesn’t compare: my peonies struggled until I amended the soil with rich compost, and now they’re the talk of the neighborhood.
The difference isn’t subtle—it’s the kind of transformation that makes you question why you didn’t start sooner.
Here’s the thing—compost isn’t just fertilizer. It improves drainage, retains moisture, and introduces beneficial microbes that help roots thrive. You don’t need fancy equipment either: a simple 50/50 mix of compost and existing soil works wonders for most flowers.
For heavy feeders like roses or dahlias, bump it up to 60% compost—they’ll reward you with bigger, bolder blooms. The key is consistency: fresh compost works, but well-aged compost (6+ months) gives the most predictable results.
What you’ll end up with is soil that smells like spring rain and flowers that bloom weeks earlier than they did before. Your zinnias will stay vibrant through heatwaves, your hydrangeas will deepen in color, and even finicky annuals like impatiens will bounce back faster after rain.
The best part? You’ll cut back on synthetic fertilizers, which means healthier soil for years to come. Let’s get your flower beds ready for their best season yet.
Works for everything from container gardens to full sun borders, and even adapts to clay-heavy soils. The only rule? Start with quality compost—avoid anything that smells sour or looks greasy. That’s where the magic happens.
📚 In This Guide
- What you need
- Instructions
- Tips and common mistakes
- Wrapping up and next steps
What you need
- ● Browns (Carbon-Rich Materials): Dry leaves – 2-3 cups (or a small bag)
- ● Shredded newspaper or cardboard – 1-2 sheets
- ● Straw or hay – 1-2 handfuls
- ● Wood chips or sawdust (untreated) – ½ cup
- ● Greens (Nitrogen-Rich Materials): Fresh grass clippings – 1-2 cups (avoid if treated with herbicides)
- ● Fruit and vegetable scraps – 1-2 cups (avoid meat/dairy)
- ● Coffee grounds – ½ cup (great for acid-loving flowers!)
- ● Fresh plant trimmings – 1-2 handfuls (weeds without seeds preferred)
- ● Water: Enough to keep the pile damp (like a wrung-out sponge)
- ● Compost bin or pile area: 3x3x3 feet minimum (or a bin with aeration holes)
- ● Garden fork or shovel – for turning the pile 🔄
- ● Gloves – to protect your hands from prickly materials
- ○ Thermometer – to monitor heat (optional but fun for composting nerds!)
- ● Compost accelerator (e.g., worm castings or manure) – ½ cup (speeds up decomposition)
- ● pH testing kit – to check soil acidity (ideal: 6.0-7.0 for most flowers)
How to create rich compost for flower gardens
Here's how to build nutrient-dense compost that transforms your flower beds into blooming powerhouses.
🌱 Step 1: Gather the Right Composting Materials
Start with a 3:1 ratio of browns to greens—that's carbon-rich materials like dried leaves, straw, or shredded newspaper for browns, and nitrogen-rich materials like grass clippings, coffee grounds, or vegetable scraps for greens. I like to keep a dedicated bin under my sink for kitchen scraps and another for yard waste to streamline the process. The key is balance: too many greens create a smelly, anaerobic pile, while too many browns slow decomposition.
Chop materials into 1-2 inch pieces for faster breakdown. Larger chunks take longer to compost and may not fully integrate into the finished product. If you're using garden waste, remove any diseased plants or weeds with mature seeds—you don't want to propagate problems in your compost. I always include a handful of soil or finished compost in the mix to introduce beneficial microbes that jumpstart decomposition.
💧 Step 2: Build and Maintain the Compost Pile
Layer materials in 12-inch deep sections, alternating between browns and greens. Moisten each layer lightly—think of a damp sponge, not a dripping wet rag. Too little moisture slows decomposition, while too much creates an anaerobic environment that produces foul odors. Turn the pile every 1-2 weeks to aerate it and speed up the process. A well-maintained pile should heat up within a few days, indicating active microbial activity.
Monitor the pile's temperature—it should feel warm to the touch but not scorching. If it smells like rotten eggs, it's too wet and needs more browns or turning. If it's cool and dry, it needs more greens or water. I keep a small shovel handy to adjust the mix as needed. The goal is to create a crumbly, earthy-smelling material within 2-3 months—this is your finished compost, ready to enrich flower beds.
☀️ Step 3: Test and Incorporate Finished Compost
When the pile stops heating up and turns dark, crumbly, and earthy, it's ready to use. Sift out any large chunks or undecomposed materials—these will break down further in your garden. I like to run a gloved hand through the finished compost; it should feel like rich, moist soil with no gritty textures. If it still contains recognizable pieces, let it sit in a separate bin for another 4-6 weeks before using.
Mix 2-3 inches of finished compost into the top 6 inches of garden soil before planting flowers. This ensures nutrients are available where roots will grow. For container-grown flowers, blend 20-30% compost into the potting mix. The compost improves soil structure, retains moisture, and provides a slow-release fertilizer that keeps flowers thriving without the risk of burning roots that comes with synthetic fertilizers.
🌿 Step 4: Maintain Soil Fertility for Continuous Blooms
After planting, top-dress flower beds with a 1-inch layer of compost every 3-4 months to replenish nutrients. This is especially important for heavy bloomers like roses, petunias, and zinnias, which deplete soil quickly. I like to do this in early spring and again after the first flush of blooms to support continuous flowering. Avoid overdoing it—too much compost can create a nitrogen-rich environment that promotes leafy growth at the expense of flowers.
Water the composted soil lightly after application to help it integrate into the top layer. You'll notice flowers develop deeper root systems, better color, and increased resistance to pests and diseases. Over time, your garden soil will transform into a nutrient-rich, well-draining medium that supports vibrant, long-lasting blooms with minimal effort.
Tips & tricks for perfect compost for flower gardens
Here's what I learned after years of transforming my garden soil—these tricks make all the difference for vibrant blooms.
Balance is Key: The 3:1 ratio of browns to greens in Step 1 is non-negotiable for flower-friendly compost. Too many greens create that dreaded anaerobic smell, while too many browns slow everything down. I've found that adding a handful of finished compost to each new pile jumpstarts decomposition by introducing beneficial microbes—it's like giving your pile a head start. This ensures you'll hit that crumbly texture within the 2-3 month window.
Layering Technique: When building your 12-inch deep sections in Step 2, think of it like lasagna—alternating layers of browns and greens creates ideal conditions for decomposition. The key is to keep each layer moist but not soggy; I use a spray bottle to mist between layers. This prevents compaction and maintains airflow, which is crucial for that warm, active pile you want to see within days. A simple kitchen scale helps verify your 3:1 ratio if you're feeling precise.
Testing for Readiness: In Step 3, the "gloved hand test" is my go-to for determining compost readiness. When you run your hand through finished compost, it should feel like rich, moist soil with no gritty bits. If you still see recognizable pieces, let it cure for another 4-6 weeks—this extra time ensures all pathogens are broken down, making it safe for your delicate flower roots. For container plants, I blend 20-30% compost into my potting mix to give those roots the perfect head start.
Seasonal Timing: The 3-4 month top-dressing schedule in Step 4 works perfectly for my climate, but adjust based on your growing season. Early spring and post-bloom are ideal times to refresh your flower beds, but in warmer climates, you might top-dress every 2 months. The key is to match your schedule with your flowers' natural nutrient cycles—this prevents over-fertilization that can lead to lush foliage at the expense of blooms.
Pro Tips for Compost For Planting Flowers
- Here's what I learned after years of transforming my garden soil—these tricks make all the difference for vibrant blooms.
- Balance is Key: The 3:1 ratio of browns to greens in Step 1 is non-negotiable for flower-friendly compost.
- Layering Technique: When building your 12-inch deep sections in Step 2, think of it like lasagna—alternating layers of browns and greens creates ideal conditions for decomposition.
Frequently asked questions
Got questions about using compost for your flowers?
You’re not alone! Here are answers to the most common queries to help you grow a show-stopping garden with ease.
How long should I compost before using it for flowers?
Fresh compost can work, but aged compost (6–12 months) is ideal for flowers. It’s fully decomposed, nutrient-rich, and won’t burn delicate roots. If you’re in a hurry, mix it with garden soil (50/50 ratio) to balance its potency. Pro tip: Look for dark, crumbly texture—no large chunks!
When is the best time to add compost to flower beds?
Spring and early fall are the golden windows for amending soil. In spring, compost feeds blooms as they wake up; in fall, it preps roots for winter. Avoid adding it right before planting—mix it in 2–4 weeks ahead so nutrients integrate. Exception: Top-dress annuals lightly after planting for a quick boost!
Can I use compost from meat scraps or dairy for flowers?
No!
Meat/dairy compost can attract pests (like rodents or flies) and may harbor pathogens harmful to flowers. Stick to plant-based compost (veggie scraps, coffee grounds, yard waste). For extra safety, use compost tea (diluted) or finished compost labeled "organic."
What if my flowers aren’t blooming after adding compost?
Check these fixes:
- Too much nitrogen: Reduce compost (it can favor leafy growth over blooms).
- Wrong flowers: Some (like impatiens) thrive in rich soil, while others (e.g., lavender) prefer lean conditions.
- Drainage issues: Amend with perlite or sand if soil stays soggy.
- Timing: Feed again in early summer for a second bloom push.
Is homemade compost better than store-bought for flowers?
Both work, but homemade compost is custom-tailored to your garden’s needs—no additives or fillers! Store-bought blends (like worm castings) are convenient and sterile, but may lack the microbes of homemade compost. For flowers, mix both: Use store-bought as a top-dress and homemade for bulk amending.
Wrapping up and next steps
Transforming your garden with homemade compost is like giving your flowers a nutrient-packed hug—they’ll thank you with vibrant blooms and lush growth! 🌸 By enriching your soil with organic waste, you’re not just reducing landfill trash; you’re creating a thriving ecosystem where roots can stretch and petals can shine.
Start small, stay consistent, and watch your garden flourish.
Ready to take the next step? Grab a shovel, mix that compost into your soil, and plant your favorite flowers today! Your future blooms will be the brightest on the block. 🌱✨