Flowers
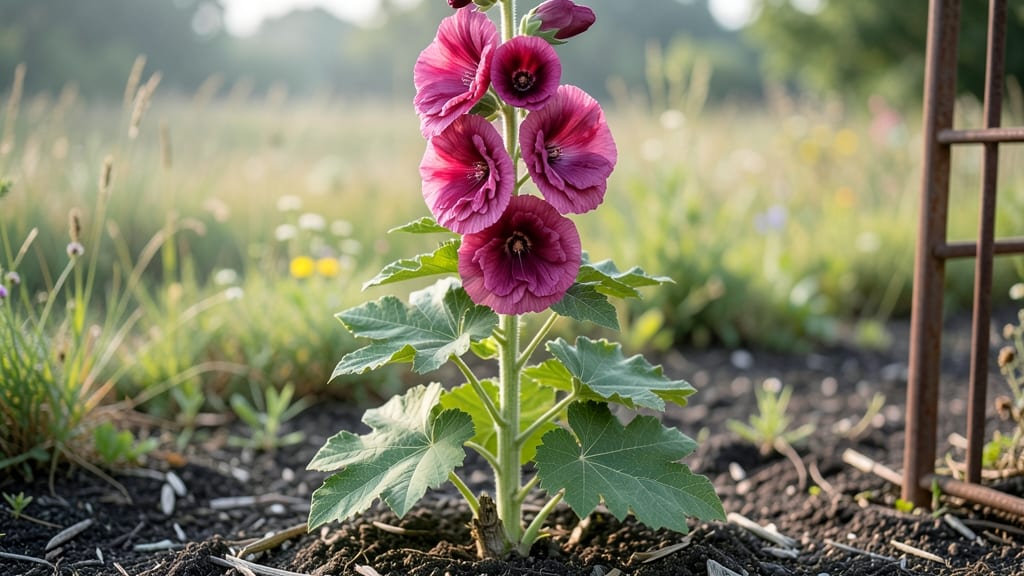
Double flowered hollyhocks turn your garden into a living tapestry of layered petals and velvety textures. 🌸 I remember the first time I saw them—towering over my grandmother’s fence, their blooms spilling like ruffled silk in shades of pink, purple, and white.
These aren’t your average hollyhocks; their double layers create a dramatic, almost sculptural presence that single-flowered varieties simply can’t match.
The secret to their showstopping growth starts with the right conditions: full sun for at least 6 hours daily, well-draining soil rich in organic matter, and a spot where they can stretch their legs—these beauties can reach 5 to 6 feet tall with proper support.
Plant them in early spring or fall, spacing seeds 12 to 18 inches apart, and watch as they transform bare patches into vertical masterpieces by midsummer.
What you’ll love most is how effortlessly they thrive once established—minimal fuss, maximum impact. Their blooms attract pollinators, their leaves provide late-season interest, and their rustic charm pairs perfectly with cottage-style gardens or modern borders.
Just be prepared for their bold personalities: some varieties lean toward leggy growth, so a little staking early on keeps them upright and proud.
Double flowered hollyhocks also reward patience with repeat blooms if you deadhead spent flowers and avoid overcrowding. In colder climates, their sturdy stems often survive winter, emerging again in spring like old friends welcoming you back.
Ready to add some old-world drama to your garden? Let’s get those seeds in the ground.
📚 In This Guide
- What you need
- Instructions
- Tips and common mistakes
- Wrapping up and next steps
What you need
- ● Double flowered hollyhock seeds – Choose heirloom varieties like ‘Black Prince’ or ‘Peach Blow’ for maximum drama. Buy 5-10 seeds per plant (they’re not always 100% viable!).
- ● Well-draining garden soil – Hollyhocks thrive in loamy, slightly alkaline soil (pH 6.0-7.5). Amend clay soil with compost or sand.
- ● Sunlight – A full-sun spot (6+ hours of direct light daily) is a must for those towering blooms.
- ● Watering can or hose – Keep soil consistently moist but not soggy, especially during germination.
- ● Fertilizer – Use a balanced, slow-release granular fertilizer (10-10-10) or organic options like composted manure.
- ● Stakes or trellis – Tall varieties (4-6 ft) need support! Use 3-4 ft bamboo stakes or a small trellis.
- ● Pruners or sharp scissors – For deadheading spent blooms and shaping plants.
- ○ Gloves (optional but recommended) – Hollyhock leaves can be prickly!
- ● Mulch (straw or shredded leaves) – Helps retain moisture and suppress weeds.
- ● Epsom salt (magnesium sulfate) – A tablespoon per plant every 4-6 weeks boosts bloom production.
- ● Disease-resistant varieties – If rust is a concern in your area, opt for ‘Lady of the Lake’ or ‘Chater’s Double’.
- ● Container gardening setup – Large pots (12+ inches deep) with drainage holes work for small spaces.
Step-by-step guide to cultivating double flowered hollyhocks
Here's how to coax those lush, layered blooms into your garden—taller, fuller, and more dramatic than single-flowered varieties.
🌱 Step 1: Select and Prepare the Planting Site
Hollyhocks thrive in full sun to partial shade, with at least 6 hours of direct sunlight daily for optimal bloom production. Choose a spot with well-draining soil—they hate soggy roots. If your soil is heavy clay, amend it with 2-3 inches of compost mixed into the top 12 inches of soil. I dig in a handful of bone meal (about ½ cup per planting hole) to boost phosphorus for strong root development.
Double-flowered varieties need extra support, so plant them 3-4 feet apart in rows or clusters. This spacing prevents overcrowding and allows airflow, reducing the risk of fungal diseases like rust. Mark the spots with stakes or a garden hose outline before digging—hollyhocks have deep taproots that dislike disturbance once established.
💧 Step 2: Plant and Water for Establishment
Dig holes twice as wide as the root ball but no deeper—hollyhocks resent being buried too deeply. Gently loosen the roots if they’re circling in the container, then place the plant in the hole so the crown sits just below soil level. Backfill with native soil mixed with 1 cup of compost per hole, pressing lightly to eliminate air pockets.
Water deeply immediately after planting—1 gallon per plant—to settle the soil and encourage root contact. Keep the soil evenly moist but not waterlogged for the first 4-6 weeks. You’ll know you’re on track when the soil feels like a damp sponge: squeeze it gently, and it should hold its shape without dripping. Mulch around the base with 2-3 inches of straw or shredded leaves to retain moisture and suppress weeds.
☀️ Step 3: Provide Support and Encourage Vertical Growth
Double-flowered hollyhocks need sturdy stakes or trellises—their heavy blooms can cause stems to flop. Install 6-foot bamboo stakes or metal cages at planting time, tying stems loosely with soft garden twine as they grow. Avoid tight ties; hollyhocks grow 3-5 feet per season, and their stems thicken rapidly. Check ties every 2-3 weeks and adjust as stems expand.
Fertilize lightly in early spring with a balanced 10-10-10 formula (about 1 tablespoon per plant), then again after the first flush of blooms fades. Over-fertilizing promotes leafy growth at the expense of flowers. Watch for yellowing lower leaves—this is normal as the plant matures, but if it spreads upward, your hollyhock may need more iron (a foliar spray of chelated iron corrects this quickly).
✂️ Step 4: Prune and Deadhead for Continuous Blooms
Deadhead spent blooms immediately after flowering to redirect energy into new buds. Cut back to the first set of healthy leaves below the bloom cluster—this encourages bushier growth. For double-flowered varieties, avoid heavy pruning mid-season; their blooms develop on old wood, and aggressive cuts can reduce next year’s flowers. Save major pruning for late winter or early spring, cutting back one-third of the oldest stems to stimulate new growth.
Watch for rust fungus (orange spots on leaves) or hollyhock rust (yellow pustules). Remove infected leaves promptly and sterilize pruners with rubbing alcohol between cuts. Space out plants for airflow, and avoid overhead watering—water at the base in the morning to let foliage dry quickly. If rust appears, treat with neem oil spray every 7-10 days until new growth emerges.
⏰ Step 5: Overwinter and Plan for Next Season
Hollyhocks are perennial in USDA zones 3-9, but their stems die back in winter. Cut back all foliage to ground level in late fall or early winter, leaving 2-3 inches of stem to protect the crown. Mulch heavily (4-6 inches) with straw or shredded leaves to insulate roots from freezing temperatures. In colder climates, add a thin layer of burlap over the crown for extra protection.
In early spring, remove old mulch and reapply compost around the base. You’ll see new shoots emerge in 3-4 weeks—this is your signal to reduce watering slightly to harden off the stems. Double-flowered hollyhocks often produce second flushes of blooms in late summer if deadheaded consistently. Mark your calendar: spring is the best time to divide clumps if they’ve outgrown their space—dig up the root ball, separate into 3-4 inch sections, and replant immediately.
Tips & tricks for cultivating stunning double flowered hollyhocks
Here's what I've learned after years of growing these showstoppers—details that make all the difference between pretty and spectacular.
Sunlight Strategy: Pay close attention to the 6 hours of direct sunlight requirement, but don't assume more is always better. Hollyhocks can handle partial shade in hot climates (like 3-4 hours of sun with afternoon shade), which prevents leaf scorch while still encouraging robust blooms. I've found that morning sun with afternoon shade works beautifully in zones 7-9, while full sun is essential in cooler northern climates.
Root Development Secret: The ½ cup of bone meal per planting hole isn't just about phosphorus—it also helps break up compacted soil around those deep taproots. For even better establishment, I mix in a handful of perlite with the bone meal to improve drainage. This is especially important if you're planting in clay soil, where roots can suffocate during wet periods.
Watering Wisdom: That 4-6 week moist-but-not-waterlogged window is your best chance to establish strong roots before the plant becomes self-sufficient. I've discovered a simple trick: water in the morning and check soil moisture by digging 2 inches down—if it's dry, water again. This mimics natural rainfall patterns and prevents fungal issues that come from wet foliage. The 2-3 inches of mulch helps maintain this balance without constant watering.
Support System: Don't wait until stems are flopping to install your 6-foot stakes or cages—set them at planting time. I've seen too many gardeners struggle with weak stems later in the season. Use soft garden twine (not wire) and tie loosely—hollyhock stems can double in thickness during the growing season. Check ties every 2-3 weeks and adjust as stems expand. For extra stability, I sometimes add a second stake at a 45-degree angle for windy locations.
Pro Tips for Double Flowered Hollyhock
- Here's what I've learned after years of growing these showstoppers—details that make all the difference between prett...
- Sunlight Strategy: Pay close attention to the 6 hours of direct sunlight requirement, but don't assume more is always...
- Root Development Secret: The ½ cup of bone meal per planting hole isn't just about phosphorus—it also helps break up ...
Frequently asked questions
Got questions about growing double-flowered hollyhocks?
You’re not alone! Here are some of the most common concerns—and practical answers—to help you cultivate these stunning vertical stars with confidence.
How do I keep my double-flowered hollyhocks from flopping over?
Hollyhocks are tall but can get top-heavy, especially with double blooms. To prevent flopping, plant them in groups of 3-5 for mutual support, or stake individual stems with soft garden ties. Choose a spot with morning sun and afternoon shade to reduce stress on their stems.
When is the best time to plant double-flowered hollyhocks?
For most climates, spring (after the last frost) or early fall are ideal. Hollyhocks are biennials or short-lived perennials, so planting in spring gives them time to establish roots before winter. If you’re in a warm region, fall planting (6-8 weeks before the first frost) can also work well.
Why are my hollyhock leaves turning yellow or spotted?
Yellowing leaves often signal rust disease (a fungal issue common in hollyhocks). Remove affected leaves immediately, avoid overhead watering, and space plants for airflow. For prevention, rotate crops annually and choose disease-resistant varieties like ‘Black Prince’ or ‘Peach Blow.’
Can I grow double-flowered hollyhocks in containers?
Yes! While they thrive in garden beds, hollyhocks can also grow in large containers (at least 12-18 inches deep) with well-draining soil. Use a mix of potting soil and compost, and place the container where it gets full sun to partial shade. Just be prepared for shorter stems—containers limit root space.
What’s the difference between single and double-flowered hollyhocks?
Double-flowered hollyhocks have extra petal layers (often 3+ rows), creating a lush, ruffled look, while single varieties have one layer of petals with visible stamens. Doubles are stunning but may produce fewer seeds (since stamens are often replaced by petals). Singles are hardier and better for seed-saving!
Wrapping up and next steps
Double flowered hollyhocks bring unmatched vertical drama and old-world charm to any garden, and with the right care, they’ll reward you with stunning blooms year after year.
Whether you’re a seasoned gardener or just starting, their resilience and beauty make them a fantastic choice—just remember to support those towering stems and keep an eye out for pests. 🌸
Ready to transform your garden? Grab your seeds, mark those sunny spots, and get planting! Start small—try a few plants in a cluster for a show-stopping focal point—and soon, you’ll be surrounded by lush, romantic blooms that turn heads. Happy gardening! 🌱