Landscaping
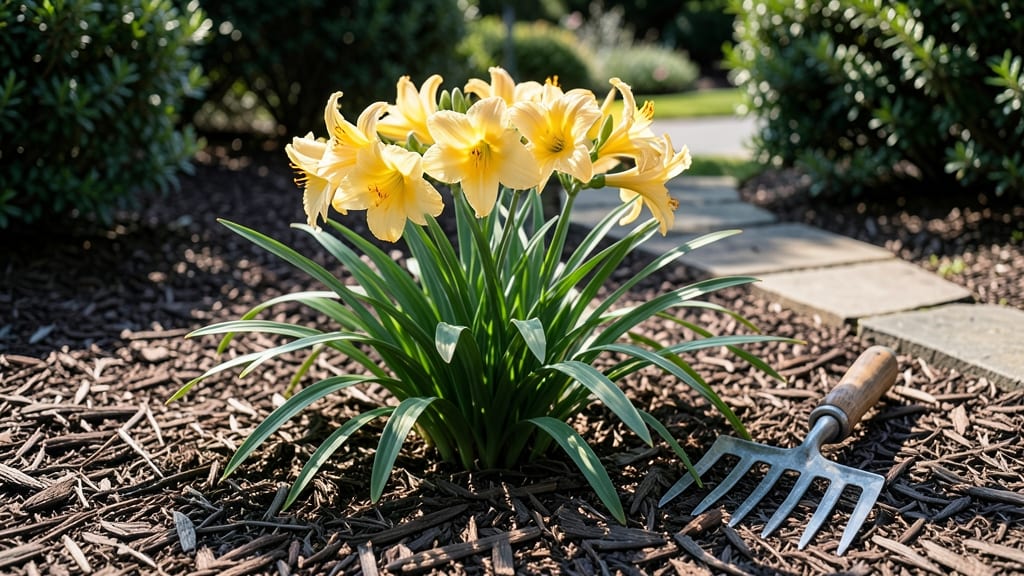
Mulching flower beds transforms them from high-maintenance headaches into lush, low-effort showstops. 🌿 I learned the hard way—before mulch, my beds were a battleground of weeds, dry soil, and uneven growth. Now, they stay vibrant with minimal effort, and the difference is night-and-day.
The secret lies in the right materials and technique. Organic mulches like wood chips or straw break down over time, feeding the soil while suppressing weeds, while inorganic options like gravel or stones keep things tidy without decomposing.
For most flower beds, 2-3 inches of mulch is ideal—thick enough to block weeds but not so deep it smothers plant roots.
You’ll notice fewer weeds popping up, soil staying moist longer, and plants thriving even in hot summers or dry spells. The best part? Mulch keeps your beds looking polished year-round, with less watering and weeding. Once you see the results, you’ll wonder how you ever gardened without it.
Timing matters too—spring and fall are perfect for fresh mulch, while summer refreshes help maintain moisture. Just avoid piling mulch against stems (it can cause rot) and skip fresh wood chips near young plants. With these simple steps, your flower beds will stay healthy, beautiful, and almost effortless to maintain.
📚 In This Guide
- What you need
- Instructions
- Tips and common mistakes
- Wrapping up and next steps
What you need
- ● Mulch: Organic: Shredded bark, wood chips, straw, or pine needles (3–4 inches per bed, 1–2 cubic yards per 100 sq. ft.)
- ● Inorganic: Gravel, rubber mulch, or landscape fabric (check local regulations—some areas restrict inorganic mulch).
- ● Garden Tools: Rake (bamboo or plastic, 18–24 inches wide)
- ● Garden hoe or spade (for edging and removing weeds)
- ● Wheelbarrow or tarp (to haul mulch, 3–4 cubic feet capacity)
- ○ Safety Gear (Optional but Recommended): Gloves (heavy-duty for organic mulch, nitrile-coated for grip)
- ● Dust mask (if handling fresh wood chips or straw)
- ● Knee pads (for comfort during long sessions)
- ● Clear the flower bed of weeds, debris, and old mulch (a 6–12 inch radius around plants is ideal).
- ● Water the bed 1–2 days before mulching (soil should be moist but not soggy).
- ● Check for pests or diseases (remove any infected plants or critters first).
- ● Measure your flower bed’s length × width to calculate mulch quantity (use a tape measure).
Step-by-step guide for creating a weed-suppressing flower bed layer
Here’s my go-to method for keeping flower beds lush, weed-free, and looking polished all season long.
🌱 Step 1: Prepare the Soil Surface
Start by clearing the flower bed of any weeds, debris, or dead plant material. Use a garden rake or hoe to pull weeds by the roots—this prevents regrowth. I like to work when the soil is slightly damp; it makes pulling weeds easier and reduces the chance of leaving fragments behind.
Next, lightly fluff the soil surface with a rake or your gloved hands. This creates small air pockets, which helps moisture penetrate and roots establish. Avoid disturbing the roots of existing plants—just loosen the top ½ inch of soil. You’ll know you’ve done enough when the surface looks evenly textured and free of clumps.
🌿 Step 2: Choose and Apply the Mulch Layer
For flower beds, I prefer organic mulches like shredded bark, straw, or wood chips because they break down over time, enriching the soil. Spread a 2-3 inch thick layer evenly across the bed, keeping it 2-3 inches away from plant stems to prevent rot. Here’s the trick: overlap edges slightly so there are no gaps where weeds can sneak through.
Use a rake to smooth the mulch and create an even, uniform layer. You’ll notice the mulch looks thicker in some spots—this is normal. The goal is consistency, not perfection. If you’re using dyed mulch, skip this step; it’s already uniform. Water the bed lightly after applying mulch to help it settle and adhere to the soil.
✂️ Step 3: Maintain and Refresh the Mulch
Check your mulch every 2-3 months to see if it’s breaking down or thinning. If it looks patchy or less than 2 inches thick, add a fresh layer. I usually refresh mulch in early spring and late summer to keep it effective through both growing seasons. This prevents weeds from pushing through and keeps moisture levels steady.
When refreshing, pull back any mulch that’s piled against plant stems and redistribute it evenly. You’ll see a difference in weed suppression almost immediately—fewer weeds mean less competition for your flowers, and the soil stays cooler in summer and warmer in winter. This is the moment that matters: a well-maintained mulch layer keeps your flower bed looking effortless.
Tips & tricks for perfect mulched flower beds
A few simple strategies that'll make your mulching effortless and your flower beds thrive all season.
Timing Tip: The best time to prepare your flower bed is on a cool, overcast day or early morning when the soil is slightly damp. This makes pulling weeds easier and helps prevent new weeds from sprouting immediately after you've cleared the area. I've found that working when the ground is moist reduces the chance of leaving weed roots behind, which is the real secret to long-term weed control.
Mulch Selection: Not all mulches are created equal. For flower beds, I recommend organic options like shredded bark or wood chips—they break down over time and add nutrients to the soil. If you're using dyed mulch, skip the smoothing step since it's already uniform. The key is to keep that 2-3 inch thick layer consistent, as this is what blocks sunlight and prevents weed seeds from germinating.
Edge Control: One of the biggest mistakes I see is letting mulch pile up against plant stems. This can cause rot and attract pests. Instead, keep mulch 2-3 inches away from stems and use a rake to create a neat edge around plants. This small detail makes a huge difference in plant health and appearance.
Maintenance Strategy: The 2-3 month refresh schedule is perfect for keeping mulch effective. I've learned that checking mulch thickness in early spring and late summer helps maintain its weed-suppressing power. When refreshing, pull back any mulch piled against stems and redistribute it evenly. This ensures your flower bed stays healthy and weed-free without requiring constant attention.
Pro Tips for Mulch Flower Beds
- A few simple strategies that'll make your mulching effortless and your flower beds thrive all season.
- Timing Tip: The best time to prepare your flower bed is on a cool, overcast day or early morning when the soil is slightly damp.
- Mulch Selection: Not all mulches are created equal.
Frequently asked questions
Got questions about mulching your flower beds? You’re not alone! Here are answers to some of the most common concerns to help you mulch like a pro.
What’s the best time of year to mulch flower beds?
Spring and early fall are ideal—spring helps retain moisture for emerging plants, while fall protects roots from winter frost. Avoid mulching right after planting (wait 4–6 weeks) to let soil settle. For established beds, top up in late winter or early spring to refresh the layer.
How thick should mulch be for flower beds?
Aim for 2–4 inches of mulch. Too thin (under 2 inches) won’t suppress weeds effectively, while too thick (over 4 inches) can smother plants and trap excess moisture. Adjust based on your mulch type—wood chips break down faster than bark, so check thickness annually.
Can I reuse old mulch from my flower beds?
Yes, but with caution! If the old mulch is mostly intact (not dusty or moldy), you can spread it back over the bed. Mix it with fresh mulch to refresh nutrients. Avoid reusing mulch with visible mold, pests, or excessive decomposition—it may harm plants or attract critters.
Will mulch attract pests like slugs or termites?
Mulch can attract slugs (especially in damp areas) and termites (if wood-based mulch touches wood structures). To deter pests:
- Choose cedar or pine mulch (natural repellents).
- Keep mulch 2–3 inches away from plant stems to reduce slug hiding spots.
- Add diatomaceous earth or copper barriers for slugs.
What’s a budget-friendly mulch alternative for flower beds?
Skip expensive store-bought mulch! Try these free/cheap options:
- Grass clippings (fresh, not piled thickly to avoid matting).
- Leaves (shredded to prevent matting; great for moisture retention).
- Straw or hay (avoid seed-contaminated hay).
- Cardboard/newspaper (as a weed barrier under mulch).
Wrapping up and next steps
Mulching your flower beds is a simple yet powerful way to boost beauty, conserve water, and save time—all while keeping weeds at bay. 🌸 Whether you’re using organic materials like wood chips or inorganic options like gravel, the key is consistency and the right technique.
With these steps, your garden will thrive with less effort and more stunning results year-round!
Ready to take your flower beds to the next level? Pick your mulch, grab your tools, and get started today! Your future self—and your blooms—will thank you. 🌿