Landscaping
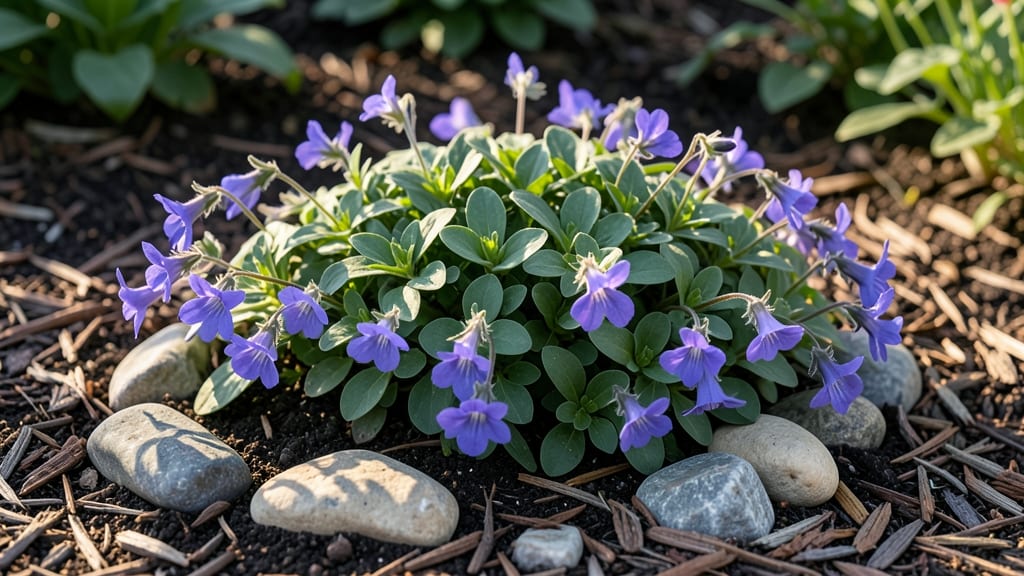
A small flower bed in front of your house can transform your home’s first impression—without turning into a high-maintenance headache. 🌸 I’ve designed three-foot-wide beds that burst with color while requiring just 10 minutes of weekly care, and they’ve earned more than one neighbor’s “wow.”
The trick? Layering plants by height, choosing drought-tolerant varieties, and letting nature do most of the work once established.
Start with a 3-foot-wide by 4-foot-long bed (standard for most front porches) and divide it into three zones: tall back, medium middle, and low front. Use evergreen shrubs like boxwood or dwarf lilac for structure, then fill in with perennials like coneflowers and ornamental grasses that return every year.
Annuals like petunias or marigolds add instant pops of color for minimal effort.
By summer’s end, you’ll have a bed that stays vibrant with almost no deadheading or watering—just the occasional mulch refresh. The right plants thrive on neglect, and the layered look creates depth that makes small spaces feel intentional. Plus, you’ll avoid the “weedy” look that plagues so many front yards.
This design works for partial sun to full sun and scales to any width, whether you’ve got a narrow strip or a slightly wider rectangle. The key is starting small, sticking to low-water plants, and letting the bed evolve naturally over the seasons.
Ready to make your front yard the envy of the block?
📚 In This Guide
- What you need
- Instructions
- Tips and common mistakes
- Wrapping up and next steps
What you need
- ● Soil: 2–3 bags of high-quality garden soil (1–2 cubic feet per bag, depending on bed size). Look for a mix with compost or peat for better drainage.
- ● Mulch: 1–2 bags of organic mulch (pine bark, shredded leaves, or cocoa hulls) to retain moisture and suppress weeds.
- ● Plants: 3–5 perennial flowers (e.g., lavender, coneflowers, or daylilies) for long-term color.
- ● 2–3 annuals (e.g., petunias, marigolds, or impatiens) for instant pops of color.
- ● 1–2 shrubs or ornamental grasses (e.g., dwarf boxwood or fountain grass) for structure.
- ● Fertilizer: A slow-release balanced fertilizer (10-10-10) or organic options like composted manure.
- ● A garden trowel or hand shovel for digging.
- ● A garden hose with spray nozzle or watering can.
- ● Gloves to protect your hands.
- ● Pruning shears for trimming plants.
- ○ Kneeling pad for comfort (optional but helpful!).
- ● A well-defined bed outline (use spray paint or a garden hose to mark the shape).
- ● Sunlight assessment: Know if your bed gets full sun (6+ hours), partial shade (3–6 hours), or full shade (<3 hours).
- ● Drainage check: Ensure the area doesn’t pool water after rain (amend soil with sand if needed).
How to design a stunning small flower bed that requires almost no upkeep
Here's the approach I've perfected for homeowners who want beauty without the daily work.
🪴 Step 1: Measure and Prepare the Space
Start by marking your bed's dimensions with garden stakes and string. For a front-of-house bed, I recommend 3-4 feet wide and 6-8 feet long—narrow enough to maintain easily but wide enough to create visual impact. Remove all grass, weeds, and debris down to at least 4 inches deep using a spade or edging tool. This prevents future competition with your plants.
Here's the thing—skipping this step leads to weeds popping up constantly. I like to use a border edging tool to create clean lines, especially if your bed abuts a sidewalk or driveway. The edging prevents soil from spilling into walkways and keeps the bed looking intentional. For a 4-foot-wide bed, you'll want to dig down about 6-8 inches to create space for both roots and mulch.
☀️ Step 2: Choose the Right Plants for Year-Round Interest
For low-maintenance appeal, I select plants that thrive in similar conditions and offer seasonal color. Start with 3-5 perennials that return yearly—like black-eyed Susans, coneflowers, or daylilies—and add 2-3 ornamental grasses for texture. These plants establish deep roots quickly and need minimal watering once established.
Add 1-2 shrubs (like dwarf boxwood or hydrangea) for structure and height. These act as anchors and reduce the number of annuals you'll need to replace. I always include 1-2 bulbs (like daffodils or tulips) for early spring color before perennials wake up. Space plants according to their mature size—check the tag for guidance, but 12-18 inches apart is a good rule for most perennials.
💧 Step 3: Amend Soil and Mulch Properly
Mix 2-3 inches of compost into the top 6 inches of soil to improve drainage and fertility. This step is critical—many front yards have compacted clay that strangles roots. I like to use a garden fork to loosen the soil before adding compost. For a 4-foot-wide bed, you'll need about 2 cubic feet of compost (or roughly 1 bag for a small bed).
After planting, spread 2-3 inches of mulch (like shredded bark or pine straw) over the soil surface, keeping it 2 inches away from plant stems to prevent rot. Mulch conserves moisture, suppresses weeds, and keeps roots cool in summer. Replenish mulch annually in late winter before new growth begins. This ensures your bed stays weed-free and hydrated with minimal effort.
✂️ Step 4: Water and Maintain Strategically
Water deeply once a week during the first growing season to encourage deep root growth. You'll know you're doing it right when water drains 4-6 inches deep—stick your finger in the soil to check. After the first year, most perennials will be established enough to handle rainwater alone. I set a reminder to check soil moisture in drought periods—if the top 2 inches feel dry, give it a drink.
Prune back dead or leggy stems in early spring before new growth starts. This keeps plants healthy and encourages bushier growth. For grasses, I cut them back to 2-3 inches tall in late winter. This prevents them from looking ragged and allows new growth to emerge cleanly. A quick 30-minute maintenance session every 4-6 weeks keeps the bed looking polished without daily effort.
🌿 Step 5: Add Finishing Touches for Curb Appeal
Frame the bed with low stone borders or metal edging to keep it looking intentional. I like to use sandstone or slate because they blend with most home exteriors and require no maintenance. For a 6-foot-long bed, you'll need about 10-12 linear feet of edging material. Add a small stepping stone path if the bed is near a walkway—this invites people to enjoy it while keeping foot traffic off the plants.
Finally, add 1-2 accent plants like lavender or Russian sage for fragrance and texture. These drought-tolerant plants thrive with almost no care and add a sensory element that makes the bed feel special. Step back and admire your work—this bed will look stunning with less than 1 hour of maintenance per month once established.
Tips & tricks for perfecting your low-maintenance front flower bed
Real talk: the details in these steps make the difference between a garden that thrives and one that fades into the background. I've learned these tricks after watching too many beds struggle with weeds or lackluster color.
Soil Preparation Secret: Don't just dig—loosen the soil thoroughly with your garden fork in Step 1. I press the tines down at a 45-degree angle and wiggle them to break up compacted layers. This creates pockets for roots to spread, which is especially important for perennials that need to establish deep systems. For clay-heavy soil, mix in 1 part sand to 3 parts compost before planting to improve drainage without overwhelming your budget.
Plant Placement Strategy: When arranging your 3-5 perennials in Step 2, place taller plants toward the back and shorter ones toward the front. I sketch a simple diagram first—this prevents overcrowding and ensures every plant gets sunlight. For a 4-foot-wide bed, I position shrubs on one side and bulbs on the other to create visual balance. The 12-18 inch spacing recommendation works, but I often stretch it to 24 inches for taller varieties to prevent competition.
Mulch Maintenance Hack: Replenish your 2-3 inches of mulch in Step 3 every spring, but don't just pile it on—rake it out and redistribute it evenly. This prevents mulch from forming a barrier that blocks water and air from reaching the soil. I also use a 1-inch layer of coarse gravel around plant stems as an optional extra barrier against weeds. The key is keeping mulch 2 inches away from stems to prevent rot while still suppressing weeds effectively.
Watering Wisdom: That once-a-week deep watering in Step 4 is non-negotiable during the first year, but here's the thing: timing matters. Water in the early morning to reduce evaporation and fungal risks. I use a soaker hose to deliver water slowly at the base of plants—this encourages deep root growth instead of surface moisture that promotes weeds. After the first year, most perennials will handle rainwater alone, but I still check soil moisture during droughts by sticking my finger 2 inches deep.
Pro Tips for Small Flower Bed In Front Of House
- Real talk: the details in these steps make the difference between a garden that thrives and one that fades into the background.
- Soil Preparation Secret: Don't just dig—loosen the soil thoroughly with your garden fork in Step 1.
- Plant Placement Strategy: When arranging your 3-5 perennials in Step 2, place taller plants toward the back and shorter ones toward the front.
Frequently asked questions
Got questions about creating or maintaining a small flower bed in front of your house? Here are some common ones—and their answers—to help you get started with confidence!
What’s the best time of year to plant a small flower bed?
The ideal time depends on your climate, but spring (after the last frost) or early fall are the sweet spots. These seasons offer mild temperatures and plenty of rain, giving plants a strong start. For perennials, fall planting is especially great—they establish roots before winter dormancy. If you’re in a warm zone, winter can work too!
How much does it cost to create a small flower bed?
Costs vary based on materials and size, but a basic 4’x4’ bed typically runs $20–$100. Breakdown:
- Soil/amendments: $10–$30 (compost, mulch)
- Plants: $10–$50 (perennials vs. annuals)
- Edging/borders: $5–$20 (stones, bricks, or metal)
- Tools: $0–$20 (if you don’t already own them)
DIY saves money—just repurpose materials like gravel from your driveway or old bricks!
What are the easiest low-maintenance flowers for beginners?
Start with these tough, resilient picks that thrive with minimal fuss:
- Sedum (Stonecrop): Drought-proof, spreads easily, and blooms all summer.
- Lavender: Fragrant, deer-resistant, and loves full sun.
- Daylilies: Come back yearly with zero effort.
- Marigolds: Bright, pest-repelling annuals (great for borders!).
Pro tip: Pair them with ground cover like creeping thyme to cut down on weeds!
Why are my flowers wilting or dying after planting?
Don’t panic—most issues stem from these fixes:
- Underwatering: Check soil moisture daily for the first week (1 inch of water is ideal).
- Overwatering: soggy soil suffocates roots—let the top inch dry between waterings.
- Poor drainage: Amend heavy clay soil with sand or compost.
- Too much sun/shade: Match plants to your bed’s light conditions (e.g., hostas for shade, sunflowers for full sun).
If pests (like aphids) are the culprit, spray with soapy water or introduce ladybugs!
Can I add a small flower bed to a concrete or paved driveway?
Use raised beds, window boxes, or container gardens to bypass concrete constraints. For driveways:
- Raised beds: Fill with lightweight soil and line with landscape fabric to prevent weeds.
- Cracks/seams: Use self-watering planters or pre-made kits designed for tight spaces.
- Vertical gardens: Hang wall pockets or trellises along fences for a lush, space-saving look.
Bonus: Choose succulents or drought-tolerant plants to reduce watering hassles!
Wrapping up and next steps
A small flower bed in front of your house isn’t just a pretty addition—it’s a low-maintenance powerhouse for curb appeal and joy. With the right plants, soil prep, and a little creativity, you’ve got a space that thrives with minimal effort while making your home shine. 🌸
Now that you’re armed with tips and answers, take the first step—whether it’s sketching a design, grabbing supplies, or planting that first bulb. Your future self (and neighbors!) will thank you. Happy gardening! 🌱