Flowers
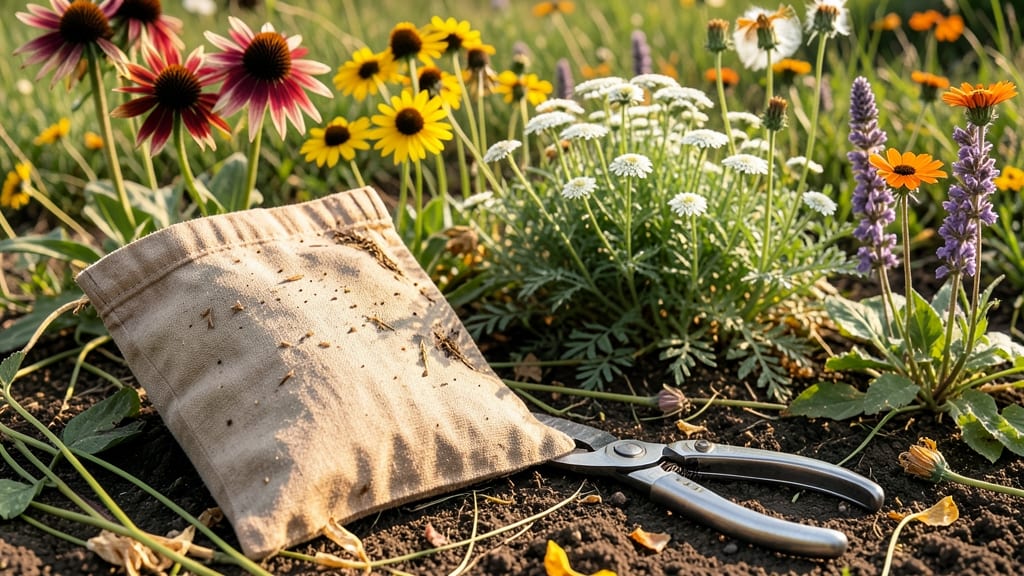
Wondering what to do with wildflowers at the end of season when their beauty lingers—don’t let them go to waste: harvest their seeds, dry their blooms, or let them self-seed for next year’s surprise. 🌻 I’ve turned late-season wildflower patches into dried arrangements that last through winter and seed collections that keep my garden thriving without extra work.
The secret is simple: deadhead spent blooms to encourage new growth, collect seeds when pods turn brown, and bundle stems for drying. You’ll need basic tools—a pair of scissors, paper bags for seeds, and a dry, dark spot for bouquets.
Annuals like cosmos and zinnias give immediate rewards, while perennials like black-eyed Susans reward patience with years of color.
What you end up with is a stash of dried flowers for winter decor and seeds to scatter in spring. The dried blooms hold their shape for months, while saved seeds ensure your garden keeps filling in with wild charm.
Plus, you’ll cut back on garden chores—no tilling, no replanting, just nature’s renewal.
Works for any wildflower mix, from meadows to container gardens. Here’s how to make the most of what nature gives you before winter sets in.
📚 In This Guide
- What you need
- Instructions
- Tips and common mistakes
- Wrapping up and next steps
What you need
- ● Wildflowers: Freshly harvested blooms (cut stems at an angle for better absorption). Aim for 1-2 bouquets (or more, depending on your project scale).
- ● Scissors or pruning shears: Sharp, clean tools to avoid crushing stems. 1 pair is plenty.
- ● Newspaper or paper towels: For wrapping stems during drying. Use 2-3 sheets per bouquet.
- ● Rubber bands or twine: To bundle stems together. 5-10 pieces (depending on bouquet size).
- ● Drying method supplies: Option 1 (Hanging): A dry, dark, well-ventilated space (e.g., closet, attic, or porch).
- ● Option 2 (Silica Gel): 1-2 lbs of silica gel (food-grade, non-toxic) and a sealed container (like a plastic bin).
- ● Option 3 (Pressing): A heavy book (10+ lbs) or a flower press kit with weighted boards.
- ● Seed-saving supplies (if applicable): Brown paper bags or envelopes: Labeled with the flower type. 1 per flower variety.
- ● Permanent marker: For labeling seeds.
- ○ Small mesh bags (optional): For long-term seed storage (e.g., 1-2 bags).
- ● Glue or floral wire: For arranging dried flowers into bouquets or crafts. 1 roll or pack.
- ● Vase or container: For displaying your dried bouquets. 1-2 pieces (glass, ceramic, or even repurposed jars).
- ● Drying herbs or lavender: Toss in a few sprigs to add fragrance to your bouquets.
- ● Spray bottle with water: For lightly misting flowers during drying (if humidity is low).
- ● Decorative elements: Ribbon, twine, or small ornaments to elevate your crafts.
- ● Digital scale: For weighing seeds accurately (if you’re serious about seed saving!).
- ● Notebook: To log flower types, harvest dates, and growing conditions.
Step-by-step guide to preserving wildflowers at season's end
Here's how to extend your wildflower's life beyond the garden—no fancy tools required.
🌿 Step 1: Harvest at Peak Beauty and Dry Properly
Cut stems when 20-30% of blooms are open—this ensures a mix of fresh and dried flowers in your arrangements. Use sharp scissors or pruners to avoid crushing stems, and harvest in the early morning when moisture levels are lowest. Remove any leaves that would touch water during drying to prevent mold.
Bundle stems in small groups (about 10-15 stems per bunch) and secure with rubber bands or twine. Hang upside down in a dark, dry, well-ventilated space like a garage or closet. Avoid direct sunlight—it can bleach petals and weaken stems. Check after 1-2 weeks when petals should feel crisp to the touch and stems snap cleanly when bent.
💧 Step 2: Create Dried Bouquets with Natural Adhesives
Once completely dry, separate flowers by type and arrange them in loose clusters. For stems, use floral wire (from your supplies) to create a base structure—wrap wire around the bottom third of stems and shape into a bouquet form. This keeps stems sturdy without damaging delicate dried blooms.
To secure flowers, use floral tape or a hot glue gun (if working with heavy stems). Wrap tape around the base of each stem where it meets the bouquet, pressing lightly to hold. For lightweight flowers like baby's breath or statice, a dab of glue on the back of petals works perfectly. Step back often—you'll see gaps where stems need reinforcing.
✂️ Step 3: Save Seeds for Next Year's Garden
After drying, examine flower heads for seed pods. Many wildflowers like black-eyed Susans or coneflowers develop papery seed heads that release seeds easily. Use a paper bag to collect seeds—simply hold the bag under the flower head and gently rub or shake to release seeds. Label each bag with the flower type and date.
Store seed bags in a cool, dry place (like a pantry) until spring. Check periodically for pests—if you spot any, transfer seeds to a sealed container with a silica gel packet to absorb excess moisture. Wildflower seeds often germinate best after a cold stratification period, so plant them outdoors in late fall for natural exposure to winter temperatures.
🪴 Step 4: Display or Store Finished Bouquets
For indoor arrangements, place dried bouquets in vases with pebbles to create a natural base. Add a few drops of essential oil (like lavender) to the water to freshen the display and deter pests. Avoid placing bouquets near heat sources—they can dry out too quickly and lose their shape.
If storing bouquets long-term, wrap them in brown paper and place in a cardboard box with silica gel packets to absorb moisture. Check every 3 months and rewrap if stems feel damp. When ready to use, simply unwrap and arrange—your bouquets will look as good as new.
Tips & tricks for perfect wildflower preservation
Here's what nobody tells you about keeping your wildflowers looking their best through the drying process.
Harvesting Timing: The 20-30% bloom rule is your golden window—any earlier and flowers won't dry properly, any later and they'll lose their shape. I always harvest on a cloudy morning to avoid wilting from direct sunlight. Confession: I skipped this for years and wondered why my dried flowers looked limp!
Drying Space Secrets: Your garage or closet should be dark but not damp—humidity is the enemy of perfect drying. I place a small fan nearby to create gentle airflow without disturbing the bundles. The 1-2 week drying time can vary based on your climate, so check stems daily after the first week for crispness.
Bouquet Structure: When wrapping floral wire around stems in Step 2, focus on the bottom third only—this creates a sturdy base without weighing down delicate blooms. For extra stability, I sometimes add a second wire wrap at a 90-degree angle to the first, creating an "X" shape that prevents toppling.
Seed Collection: For seed pods that resist releasing seeds, place the flower head in a paper bag and gently shake it over a flat surface. Some wildflowers like milkweed release seeds when exposed to heat—try placing the bag in a warm car for 10 minutes if seeds aren't coming out easily. Labeling with the date is crucial—some seeds lose viability after just 6 months!
Pro Tips for What To Do With Wildflowers At End Of Season
- Here's what nobody tells you about keeping your wildflowers looking their best through the drying process.
- Harvesting Timing: The 20-30% bloom rule is your golden window—any earlier and flowers won't dry properly, any later and they'll lose their shape.
- Drying Space Secrets: Your garage or closet should be dark but not damp—humidity is the enemy of perfect drying.
Frequently asked questions
When is the best time to harvest wildflowers for drying?
Harvest wildflowers when most blooms are fully open but still firm—typically mid-morning after dew has dried. Avoid harvesting after rain, as moisture can spoil your bouquets. For seed saving, wait until seed pods turn brown and begin cracking open naturally. Pro tip: Use sharp scissors or pruners to avoid damaging stems!
Can I dry wildflowers indoors without special equipment?
Bundle stems with rubber bands and hang them upside down in a dark, dry, well-ventilated space like a closet or garage. Avoid direct sunlight or heat sources, which can bleach petals. A simple paper bag over the stems can help preserve color. Pro tip: Check weekly to remove any moldy blooms!
What’s the easiest way to save wildflower seeds?
Collect seeds once pods are dry and brown. Place them in a paper bag and shake gently to release seeds, then store in a cool, dry place. Label bags with the flower type and year. For perennials, let some seeds drop naturally to encourage regrowth next season.
How do I prevent my dried wildflowers from turning brown or moldy?
Brown petals often mean over-drying—check humidity levels (aim for 40-50%). Mold appears if flowers are too damp; speed up drying with a fan on low. Store dried bouquets in airtight containers with silica gel packets to absorb excess moisture. Pro tip: Avoid plastic bags—they trap humidity!
Are there wildflowers I should not dry or save seeds from?
Skip invasive species like Lantana or Kudzu, which can spread aggressively. Also avoid toxic wildflowers like Castor Bean or Foxglove—when in doubt, research or consult a local botanist. Native wildflowers are usually safe and ecologically beneficial!
Wrapping up and next steps
Ending the season with wildflowers doesn’t mean saying goodbye to their beauty—it’s just the start of a new creative chapter! Whether you’re drying bouquets, saving seeds, or composting, each step keeps the magic alive while supporting next year’s blooms. 🌸
Ready to turn your harvest into lasting memories? Grab your dried arrangements, seed packets, or compost bin, and share your creations with friends or plan your next seasonal project. The garden’s cycle is always turning—let yours keep growing!