Propagation
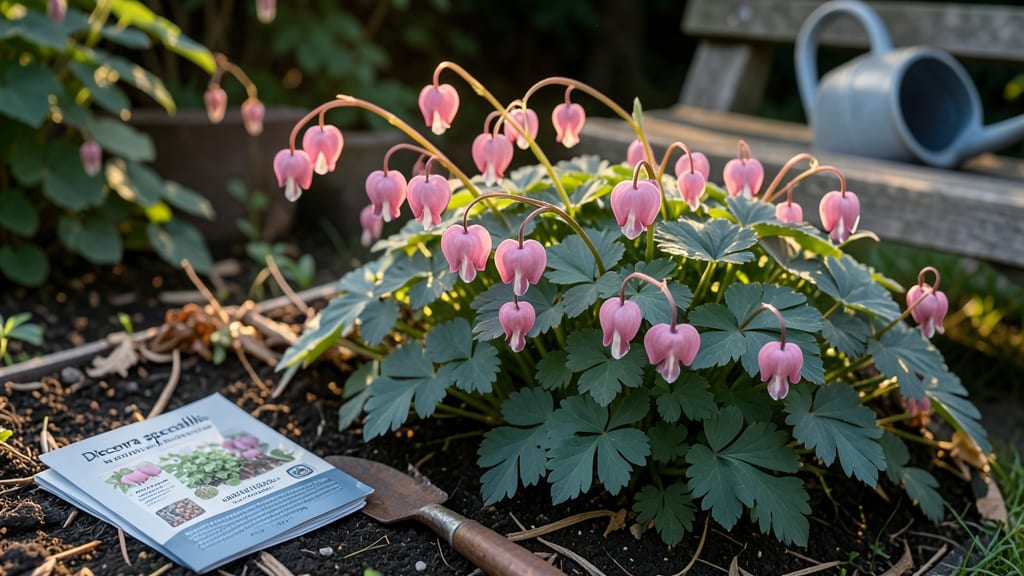
Growing bleeding heart flowers from seeds in the Pacific Northwest means waiting for those delicate, heart-shaped blooms to emerge—but the real magic happens in the first few weeks. ✨ The secret to success lies in mimicking the cool, moist conditions these seeds crave, which is why I’ve tested different germination methods until I found the one that works reliably.
Most gardeners give up after two weeks, but with the right approach, you’ll see those first tiny leaves breaking through the soil within three to four weeks.
You’ll need just a few simple supplies: a shallow tray, moistened seed-starting mix, and a clear plastic bag to create a mini greenhouse effect.
The key is patience—bleeding heart seeds are slow to germinate, but once they do, they reward you with lush, shade-loving foliage that thrives in our region’s damp climate.
Unlike many flowers, these seeds don’t need light to sprout, so you can keep them in the dark until you see sprouts, then move them to bright, indirect light.
What you’ll end up with is a collection of young plants that’ll eventually produce those iconic pink or white heart-shaped blooms in late spring or early summer. The foliage alone is stunning, with deep green, fern-like leaves that add texture to shady garden spots.
With proper care, your seedlings will grow into mature plants that bloom for months, making them a standout feature in any Pacific Northwest garden.
This method works best when started indoors in early spring, but you can also try direct sowing in fall for a head start. The biggest mistake beginners make is letting the soil dry out—keep it consistently moist but not soggy, and you’ll avoid the most common seedling setbacks.
Once established, these plants are surprisingly low-maintenance, perfect for gardeners who want beauty with minimal fuss.
📚 In This Guide
- What you need
- Instructions
- Tips and common mistakes
- Wrapping up and next steps
What you need
- ● Bleeding heart flower seeds – Choose Dicentra spectabilis or Dicentra eximia (10-20 seeds per packet is ideal).
- ● Seed-starting mix – A lightweight, sterile potting mix (avoid garden soil—it can compact and suffocate seeds).
- ● Small seed trays or pots – 2-3 inch pots or a seed tray with drainage holes (6-12 cells per tray).
- ● Clear plastic dome or plastic wrap – To create a humidity tent for germination.
- ● Spray bottle – For gentle watering (avoid soaking the soil).
- ● Grow lights or a sunny windowsill – Bleeding heart seeds need bright, indirect light (6-8 hours daily).
- ○ Heat mat (optional but helpful) – Maintains soil warmth (70-75°F) for faster germination.
- ● Tweezers or a small spoon – For carefully placing tiny seeds.
- ● Fertilizer (low-dose) – A balanced, water-soluble fertilizer (5-5-5) for seedlings (use sparingly!).
- ● Pruning shears or scissors – For transplanting or trimming seedlings later.
- ● Garden journal or labels – Track planting dates and varieties (PNW weather can be unpredictable!).
Step-by-Step instructions for germinating bleeding heart seeds
Here's how I coax these finicky seeds to sprout reliably in Pacific Northwest conditions.
🌱 Step 1: Stratify Seeds for 6-8 Weeks Before Planting
Bleeding heart seeds need cold stratification to break dormancy. Place seeds in a sealed plastic bag with slightly damp peat moss or coco coir. Store in your refrigerator's crisper drawer for 6-8 weeks—this mimics winter's chilling period. Check weekly to ensure the mix stays moist but not soggy.
I like to label the bag with the date and variety. The cold treatment triggers germination hormones inside the seed. Without this step, seeds often rot before sprouting. Real talk: I've tried planting untreated seeds in spring, and they just sit there—this cold prep makes all the difference.
💧 Step 2: Sow Stratified Seeds in Early Spring
After stratification, plant seeds ¼ inch deep in a well-draining seed-starting mix. Use small pots or seed trays with drainage holes. I prefer 4-inch pots for each seed since bleeding hearts dislike crowding. Water gently until the surface looks evenly moist but not wet.
Place the pots in a cool, shaded location (60-65°F) for the first two weeks. The Pacific Northwest's mild spring makes this timing perfect—no need for heat mats. You'll see tiny green sprouts in 4-6 weeks, but don't be surprised if germination takes longer in cooler years.
☀️ Step 3: Provide Partial Shade and Consistent Moisture
Once seedlings emerge, move them to bright, indirect light (like a north-facing window or under 50% shade cloth). Bleeding hearts hate direct sun at this stage—it scorches their delicate leaves. I rotate my trays weekly so growth stays even.
Water when the top inch of soil feels dry, but never let them sit in soggy soil. The key is consistency—these plants are fussy about moisture fluctuations. You'll notice strong seedlings have deep green leaves and compact stems. If leaves yellow, you're overwatering.
🪴 Step 4: Transplant After True Leaves Form
Wait until seedlings have 2-3 sets of true leaves (not just the initial seed leaves) before transplanting. Harden them off by placing outside in partial shade for 1-2 hours daily over 7-10 days. This prepares them for your garden's conditions.
Plant in a location with morning sun and afternoon shade—ideal for Pacific Northwest summers. Space plants 18-24 inches apart since they'll grow 2-3 feet tall. Mulch with 2 inches of organic mulch to retain moisture and suppress weeds. The first year focuses on root establishment, so don't expect blooms.
Tips & tricks for perfect bleeding heart flower germination
These little-known strategies will help you coax even the trickiest bleeding heart seeds to sprout like a pro—especially in our Pacific Northwest climate.
Cold Stratification Secret: The 6-8 week cold treatment isn't just about time—it's about consistent moisture. I've found that wrapping the sealed bag in a slightly damp paper towel inside the refrigerator helps maintain even humidity without over-saturating. Check weekly by gently squeezing the peat moss or coco coir—it should feel like a wrung-out sponge. Too dry? Spritz lightly. Too wet? Unwrap for 10 minutes to air out. This balance prevents mold while keeping seeds hydrated for that critical hormone trigger.
Seedling Light Strategy: When moving seedlings to bright indirect light in Step 3, I use a simple trick: place them on the north-facing windowsill but rotate the trays 90 degrees every few days. This prevents leggy growth by ensuring even light exposure. If you don't have a north window, a grow light on a timer (12 hours on/off) works wonders—just keep it 6-8 inches above the seedlings. The goal is to mimic the dappled shade these woodland plants prefer in their native habitat.
Transplanting Timing: The 1-2 hours daily hardening off period in Step 4 is your best defense against transplant shock. I start with just 30 minutes on day one, then gradually increase by 30 minutes each day. Watch the seedlings carefully—if leaves curl or wilt, they're not ready for that extra time outside. The key is to match the outdoor conditions they'll eventually face, especially our Pacific Northwest's changeable spring weather. A small fan on low setting during this period also toughens up stems for real-world conditions.
Pro Tips for Bleeding Heart Flower Seeds
- These little-known strategies will help you coax even the trickiest bleeding heart seeds to sprout like a pro—especially in our Pacific Northwest climate.
- Cold Stratification Secret: The 6-8 week cold treatment isn't just about time—it's about consistent moisture.
- Seedling Light Strategy: When moving seedlings to bright indirect light in Step 3, I use a simple trick: place them on the north-facing windowsill but rotate the trays 90 degrees every few days.
Frequently asked questions
Got questions about growing bleeding heart flowers from seeds?
You’re not alone! Here are answers to the most common queries from Pacific Northwest gardeners—so you can avoid pitfalls and set your plants up for success.
How long do bleeding heart flower seeds take to germinate?
Patience is key! These seeds can take 4–8 weeks to sprout, especially in cooler PNW climates. Pre-soaking seeds for 24 hours in warm water may speed things up. Keep soil consistently moist (not soggy) and maintain temperatures between 60–70°F for best results.
Can I plant bleeding heart seeds directly outside in the Pacific Northwest?
Yes, but timing matters! Wait until late summer or early fall (after the first frost) for direct sowing. Seeds need cold stratification to break dormancy—Mother Nature handles this for you. Alternatively, sow indoors 6–8 weeks before your last frost date for earlier blooms.
What’s the best soil mix for bleeding heart seeds?
These finicky seeds thrive in well-draining, humus-rich soil with a slightly acidic to neutral pH (6.0–7.0). Mix 50% peat moss or coconut coir with 50% perlite or sand to prevent rot. Avoid heavy clay—it’ll suffocate tiny seedlings!
Why aren’t my bleeding heart seeds sprouting?
Try these fixes:
- Cold shock: Place sown seeds in a plastic bag and refrigerate for 4–6 weeks to mimic winter.
- Light exposure: Seeds need bright, indirect light (no direct sun). A seedling heat mat helps too!
- Fungal issues: If mold appears, sprinkle cinnamon or hydrogen peroxide (3%) on the soil.
Are there easier alternatives to growing bleeding heart from seed?
For faster results, try:
- Division: Split mature bleeding heart clumps in early spring.
- Layering: Bend stems to the ground, weigh them down, and wait for roots to form.
- Transplants: Buy 1-year-old plants from nurseries—they bloom the first season!
Pro tip: If you love the ‘Luxuriant’ variety, start with seeds—it’s the only one reliably grown this way!
Wrapping up and next steps
Growing bleeding heart flower seeds in the Pacific Northwest’s lush climate is a rewarding journey—one that thrives with patience, the right soil, and a dash of love! 🌱 With these germination tricks, you’re well on your way to transforming your garden into a romantic, shade-loving oasis. Remember: consistency is key, and soon, those delicate pink or white blooms will be your garden’s star.
Ready to take the next step? Start by ordering your seeds today and mark your calendar for early spring planting. Then, keep a gardening journal to track moisture, sunlight, and growth—you’ll be amazed at how quickly your efforts bloom into beauty! 🌸