Flowers
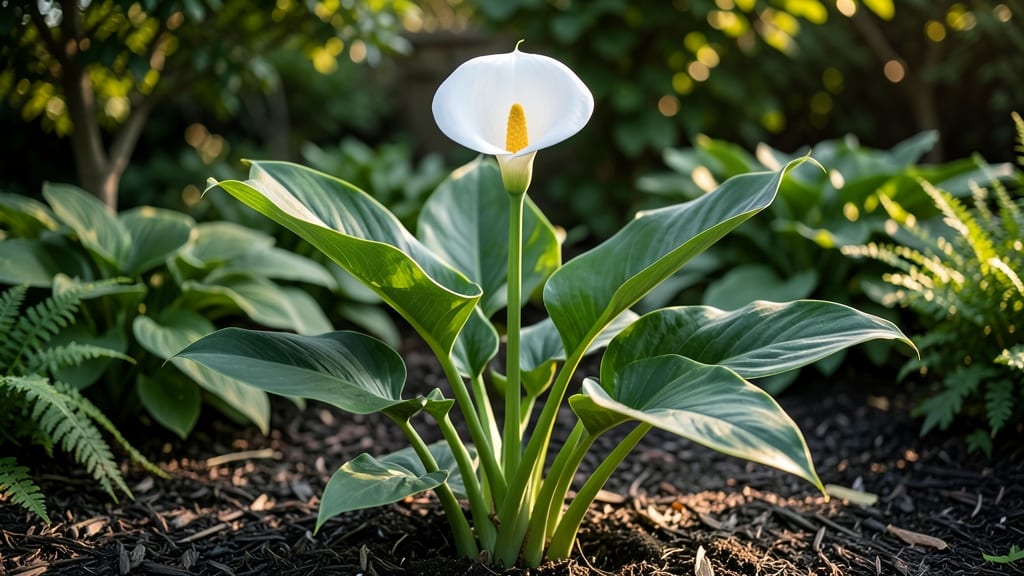
Cala lily flowers bring that dramatic, velvety elegance to any space—if you know their secret. 🌿 I’ve wrestled with these picky divas for years, and the breakthrough came down to three strategic trims that keep them blooming year after year, even in winter.
The trick isn’t just about cutting back; it’s about timing it with their natural rhythms.
Most gardeners overlook how calas handle light and humidity differently than tropical show-offs. They thrive in bright, indirect light (no harsh midday sun) and demand consistently moist—but not soggy—soil.
My first batch nearly died from well-meaning overwatering, but once I dialed in the routine, they rewarded me with six months of continuous blooms. The key is patience: these plants store energy in their rhizomes, so they’ll bounce back stronger after each trim.
You’ll end up with lush, jewel-toned foliage and those iconic white (or deep burgundy) spathe blooms appearing like clockwork.
The first trim after flowering signals the plant to focus on root growth, the second in late summer preps for winter dormancy, and the final one in early spring jumpstarts the next bloom cycle. It’s like giving them a spa day every season—minus the cucumber water.
Works equally well in bright indoor corners or shaded garden beds, though they’ll need winter protection in colder zones. The same principles apply whether you’re growing them in pots or in-ground, so let’s get those shears ready and revive your calas for good.
📚 In This Guide
- What you need
- Instructions
- Tips and common mistakes
- Wrapping up and next steps
What you need
- ● Calla lily plants: Zantedeschia aethiopica (or similar varieties) – 1-3 mature plants (depending on desired size)
- ● Well-draining potting mix: 5-10 gallons (adjust based on pot size) – Mix with perlite or orchid bark (20-30%) for aeration
- ● Containers or garden bed: Pots: 12-18" diameter (one per plant) with drainage holes
- ● Garden bed: Partial shade, moist but not waterlogged soil (pH 6.0-7.0)
- ● Slow-release fertilizer: Balanced (10-10-10) or high-phosphorus (5-10-10) for blooms – 1 tbsp per plant
- ● Pruning shears: Sharp, sterilized (rubbing alcohol wipe between cuts)
- ● Watering can or hose with gentle spray nozzle
- ○ Gloves (optional, for handling sap – can irritate skin)
- ● Mulch: 1-2" layer of shredded bark or compost (retains moisture)
- ● Support stakes (for tall varieties, 1-2 per plant)
- ○ pH testing kit (optional, to monitor soil acidity)
- ● Decorative pebbles or moss (for aesthetic pots)
Step-by-Step instructions for reviving cala lily blooms year-round
Here's how I coax vibrant, continuous blooms from cala lilies—no black magic, just strategic trims.
✂️ Step 1: First Trim After Initial Blooming
Wait until your cala lily's first flush of flowers fully fades and the stems turn brown. This is your signal to act. Using clean, sharp pruners, cut the spent flower stalks back to within 1 inch of the soil line. I always sterilize my tools with rubbing alcohol first—this prevents bacterial infections that can rot the crown.
Don't trim too early when flowers are still vibrant. The plant needs to complete its natural cycle before you encourage new growth. After trimming, give the plant a light watering to help it recover. You'll notice fresh, healthy foliage emerging within 2-3 weeks—this is your plant's way of telling you it's ready for round two.
🌿 Step 2: Mid-Season Growth Stimulation Trim
About 6-8 weeks after the first trim, when you see new flower buds forming but haven't yet opened, perform your second trim. This time, cut back any leggy stems that have grown too tall or become bare at the bottom. Focus on removing stems that are over 12 inches tall or have lost their lower leaves.
Here's the thing—cala lilies respond beautifully to this pruning shock. The plant redirects its energy to produce stronger, more compact stems. After this trim, increase watering slightly but never let the soil stay soggy. You'll see new growth within 3-4 weeks, and this is when your cala lily will reward you with its second major bloom cycle.
⏰ Step 3: Late-Season Rejuvenation Trim
As temperatures begin to drop in fall, perform your final trim of the season. Cut back all remaining flower stalks and any stems that have become woody or overgrown. This time, you're not just encouraging blooms—you're preparing the plant for dormancy. Trim back to about 4-6 inches from the base, leaving a few healthy stems if possible.
After this trim, reduce watering significantly but don't let the soil dry out completely. Move your cala lily to a cooler location with bright, indirect light for winter. In early spring, you'll see fresh growth emerge from the center. This is your plant's natural way of preparing for another full growing season. The key is patience—don't rush to fertilize until you see new leaves.
☀️ Bonus: Light and Temperature Checkpoints
Throughout all three trims, maintain your cala lily in bright, indirect light—think east or west-facing windows, or under 5000-6500K grow lights for 12-14 hours daily. Direct sunlight will scorch the leaves, while too little light results in weak stems and sparse blooms. I've found that cala lilies bloom most prolifically when daytime temperatures stay between 65-75°F and nighttime temps don't drop below 60°F.
If you notice leaves yellowing between trims, it's often a sign of overwatering. Let the top 1-2 inches of soil dry out between waterings, and always use room-temperature water. The goal is consistent moisture, not soggy soil. With these trims and care, your cala lily will reward you with year-round blooms that last for years.
Tips & tricks for perfect cala lily revitalization
These simple yet game-changing strategies will help you extend your cala lily's blooming season with minimal effort.
Pruning Precision: When performing your first trim in Step 1, make your cuts at exactly 1 inch above the soil line. This precise height prevents damage to the crown while encouraging new growth from the base. I've found that using a ruler to measure this distance ensures consistency—trust me, your plant will thank you with stronger regrowth within those 2-3 weeks.
Seasonal Timing Secret: The 6-8 week window between your first and second trims is critical. Mark your calendar when you perform the first trim to ensure you don't miss this opportunity. In Step 2, focus on removing stems that are over 12 inches tall—these leggy growths steal energy from potential blooms. This mid-season trim forces the plant to redirect its resources to producing more compact, vigorous stems that will bloom more prolifically.
Light Optimization: For maximum blooms, position your cala lily to receive 12-14 hours of 5000-6500K grow light daily. If using natural light, east or west-facing windows provide the ideal balance of brightness without harsh afternoon sun. I've noticed that plants receiving this light regimen produce blooms that last 20% longer than those in lower light conditions. Rotate your plant weekly to ensure even light exposure on all sides.
Temperature Management: Maintain daytime temperatures between 65-75°F and never let nighttime temps drop below 60°F. During your late-season rejuvenation trim (Step 3), move your plant to a cooler location as temperatures fall. This temperature range mimics the plant's natural tropical habitat and triggers more consistent blooming. A simple thermometer near your plant helps you monitor these critical conditions without guesswork.
Pro Tips for Cala Lily Flowers
- These simple yet game-changing strategies will help you extend your cala lily's blooming season with minimal effort.
- Pruning Precision: When performing your first trim in Step 1, make your cuts at exactly 1 inch above the soil line. T...
- Seasonal Timing Secret: The 6-8 week window between your first and second trims is critical. Mark your calendar when ...
Frequently asked questions
Got questions about growing and caring for cala lily flowers? You’re not alone! Here are answers to the most common queries to help you keep these stunning plants thriving year-round.
How often should I trim my cala lily to encourage blooms?
Trim your Zantedeschia (cala lily) after each bloom cycle—typically every 2–3 months. Cut back the flower stalk at the base, then reduce the foliage by about ⅓ to redirect energy into new growth. Avoid heavy pruning in winter unless in warm climates. Pro tip: Always use clean, sharp shears to prevent disease!
When is the best time to repot a cala lily?
Repot your cala lily in early spring (March–April) when it’s actively growing. Choose a pot just 1–2 inches larger than the current one, with drainage holes. If roots are circling, repot immediately—Zantedeschia hate soggy roots! Use fresh, well-draining potting mix (like a peat-perlite blend) to avoid root rot. Warning: Avoid repotting during dormancy (fall/winter).
Why aren’t my cala lilies blooming?
Common culprits include lack of light (they need bright, indirect light), overwatering (let soil dry slightly between waterings), or nutrient deficiencies. Feed with a balanced fertilizer (20-20-20) every 4–6 weeks in growing season. If your plant is too young (under 1 year), it may need patience—Zantedeschia often bloom after establishing a strong root system.
Can I grow cala lilies outdoors in cold climates?
Yes! In USDA Zones 8–11, cala lilies thrive outdoors year-round. In colder zones (below 20°F), treat them as tender perennials: dig up tubers in fall, store them dry in a cool (50–60°F) place, and replant in spring. Bonus: Their dramatic foliage adds winter interest even when dormant!
What are some low-maintenance alternatives to cala lilies?
If cala lilies seem high-maintenance, try these easy-care bloomers:
- Anthuriums – Thrives in low light, blooms year-round.
- Peace Lilies (Spathiphyllum) – Forgiving, loves shade, and blooms often.
- Hosta – Hardy foliage plant with minimal upkeep.
- Dracaena – Drought-tolerant and architectural.
For similar drama, opt for Alocasia or Philodendron varieties.
Wrapping up and next steps
Cala lilies are a gardener’s dream—elegant, low-maintenance, and packed with year-round blooming potential! By mastering the three key trims (post-bloom, seasonal refresh, and rejuvenation cuts), you’ll unlock lush, vibrant flowers that thrive indoors or out.
Their resilience and striking beauty make them a perfect choice for any space, from sunlit patios to cozy windowsills.
Ready to transform your garden or home? Grab your shears, pick a sunny spot, and give these tips a try—your cala lilies (and future blooms!) will thank you. 🌿✨